Everything from one illustration to a finished VTuber model, ready to stream.
WINDOWS / MACOSScreens from a build in development
The screenshots show the Japanese interface of a build in development. Menu labels are quoted in Japanese with the English meaning alongside.
What the app does
One illustration → a 3D model
From a near-front full-body or upper-body illustration, the app generates a rigged 3D character. No image? Describe the character in words instead.
Lip sync from the mic alone
When you talk, the app estimates the vowel from your voice and moves the mouth. No motion capture and no extra hardware.
Expressions follow what you say
Speech recognition and expression switching are done by local AI on your PC. Expression sets swap automatically to match what you said.
AI clips that play themselves
Describe a motion such as "wave a hand" to generate a short clip. During a stream it plays automatically, matched to what you say or to idle time.
Generation spends paid points. Full body ver1 (not recommended) 800 pt / Full body ver2 (not recommended) 2500 pt / Full body ver3 (recommended) 800 pt / Bust 800 pt / expression set 200 pt / background 60 pt / video 85 pt per second / input image from a description 25 pt. Points are bought in the app's shop, and your balance is always shown at the top right. Streaming itself — lip sync, expression switching, clip playback and the OBS output — costs nothing.
The whole flow
Work through the five phases below in the "model / settings" mode, then switch to "stream" mode to drive your character. You can jump between phases at any time from the phase list on the left of the screen.
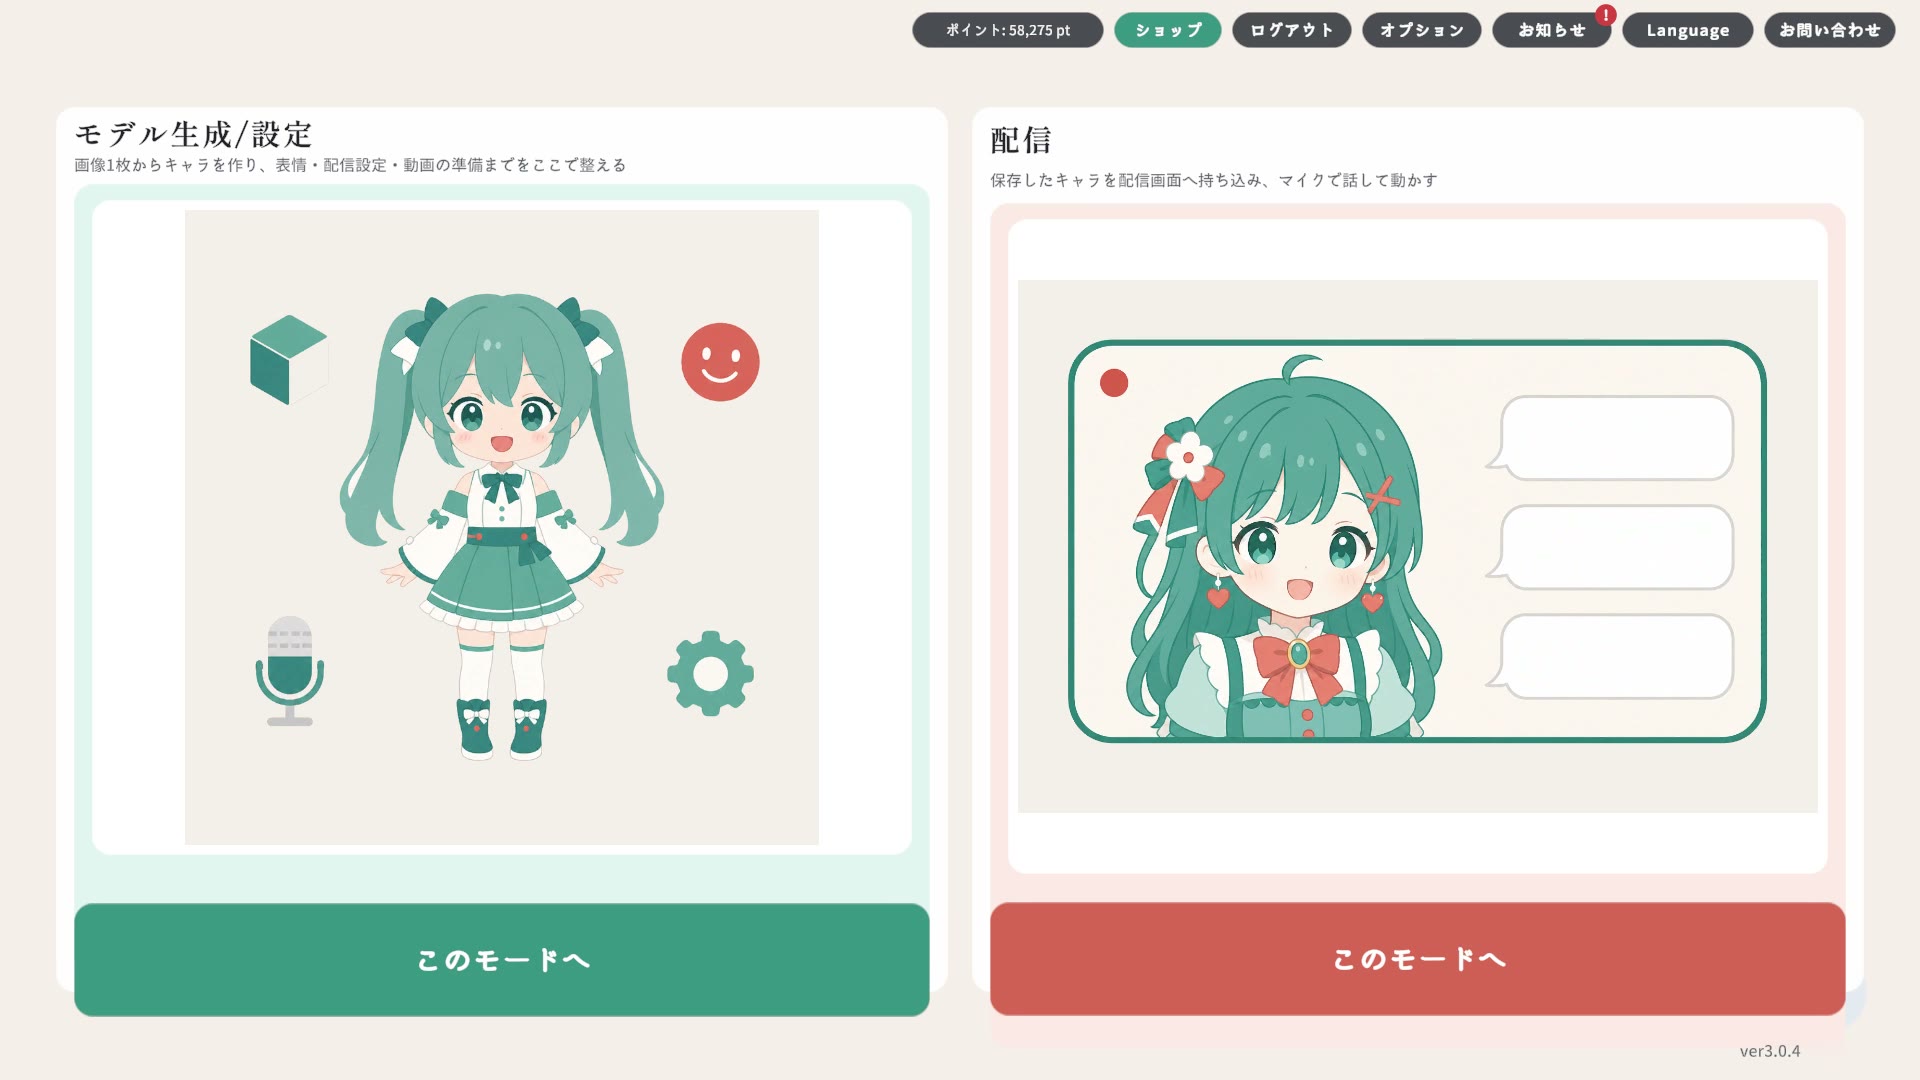
When you launch the app, the home screen offers two modes. Use 「モデル生成/設定」 (model / settings) to build and adjust a character, and 「配信」 (stream) to go live with one you already made.
The home screen. "Model / settings" on the left, "stream" on the right. Your point balance and the shop sit at the top right.
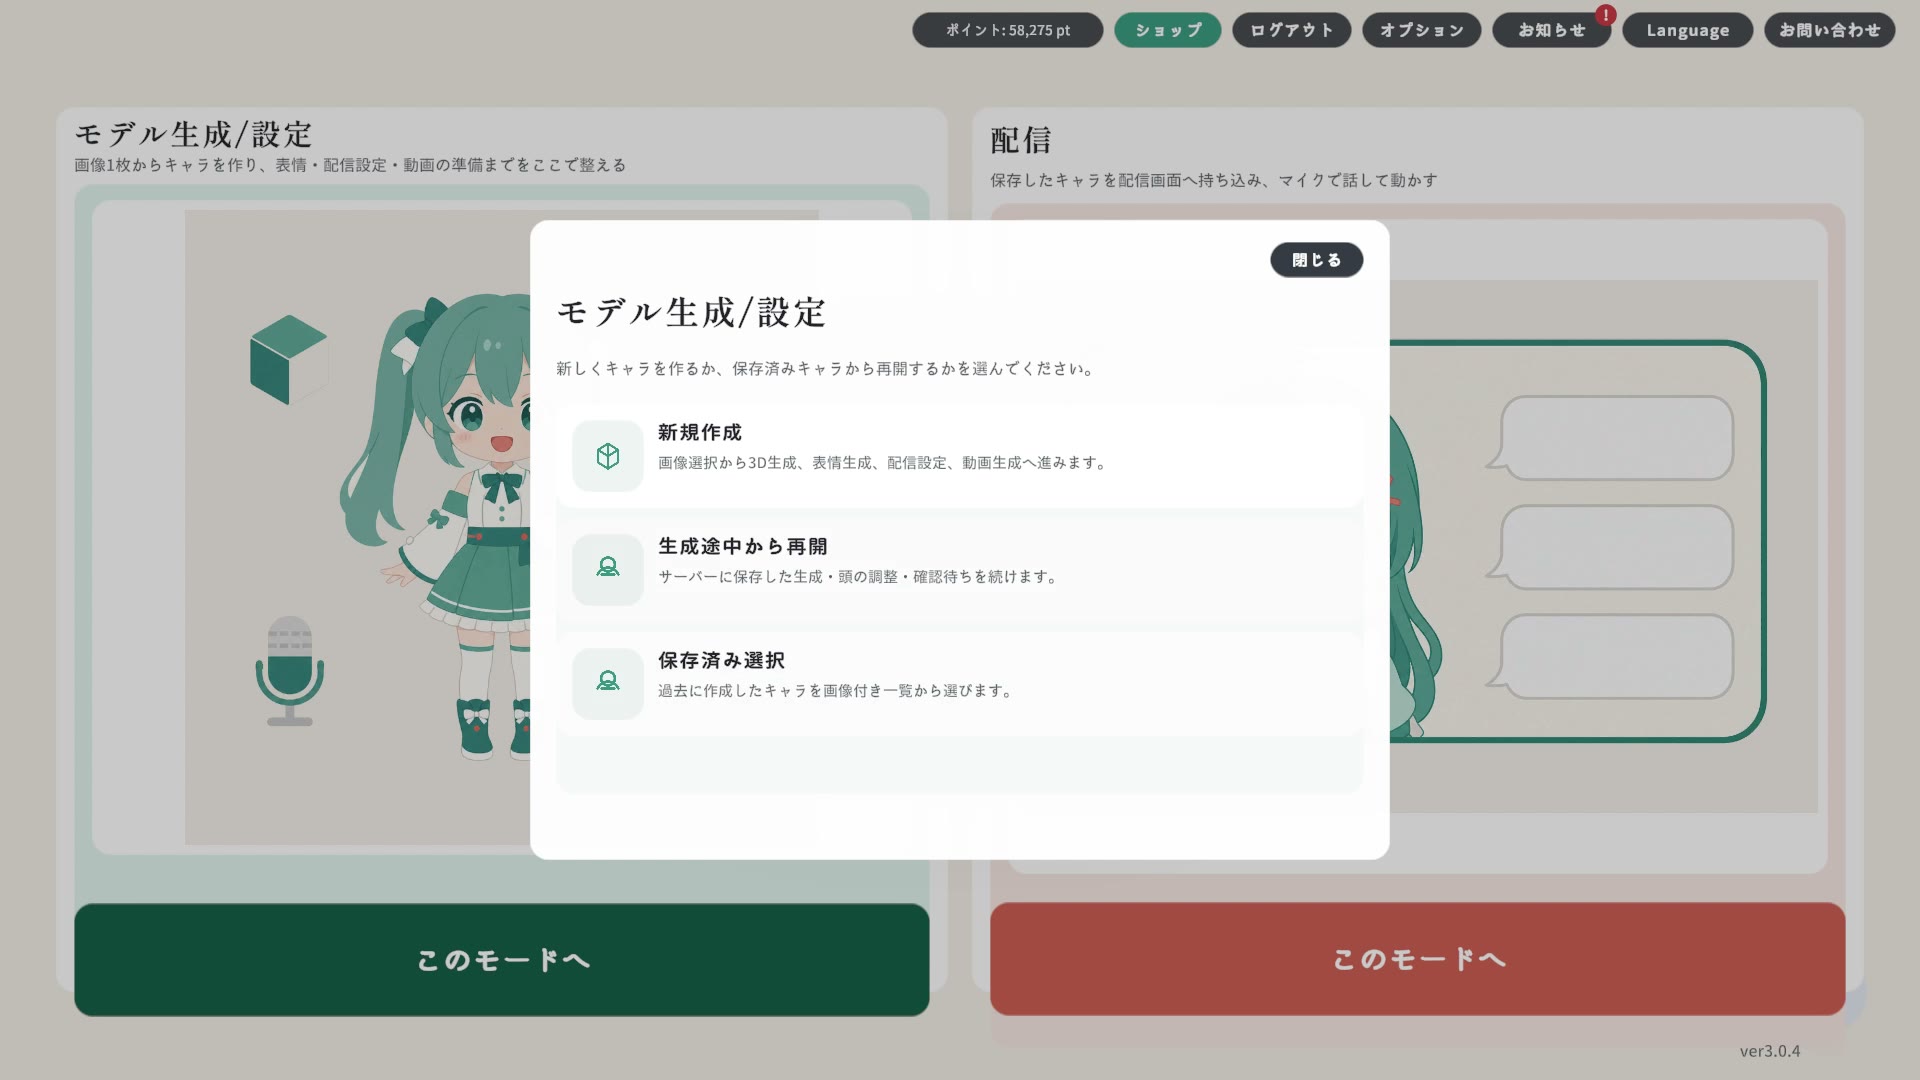
Choosing "model / settings" offers three choices: 新規作成 (new) to build a character from scratch, 生成途中から再開 (resume) to continue a generation saved on the server, or 保存済み選択 (open saved) to pick up an earlier one.
02
Generate the 3D model PHASE 1 · 3D
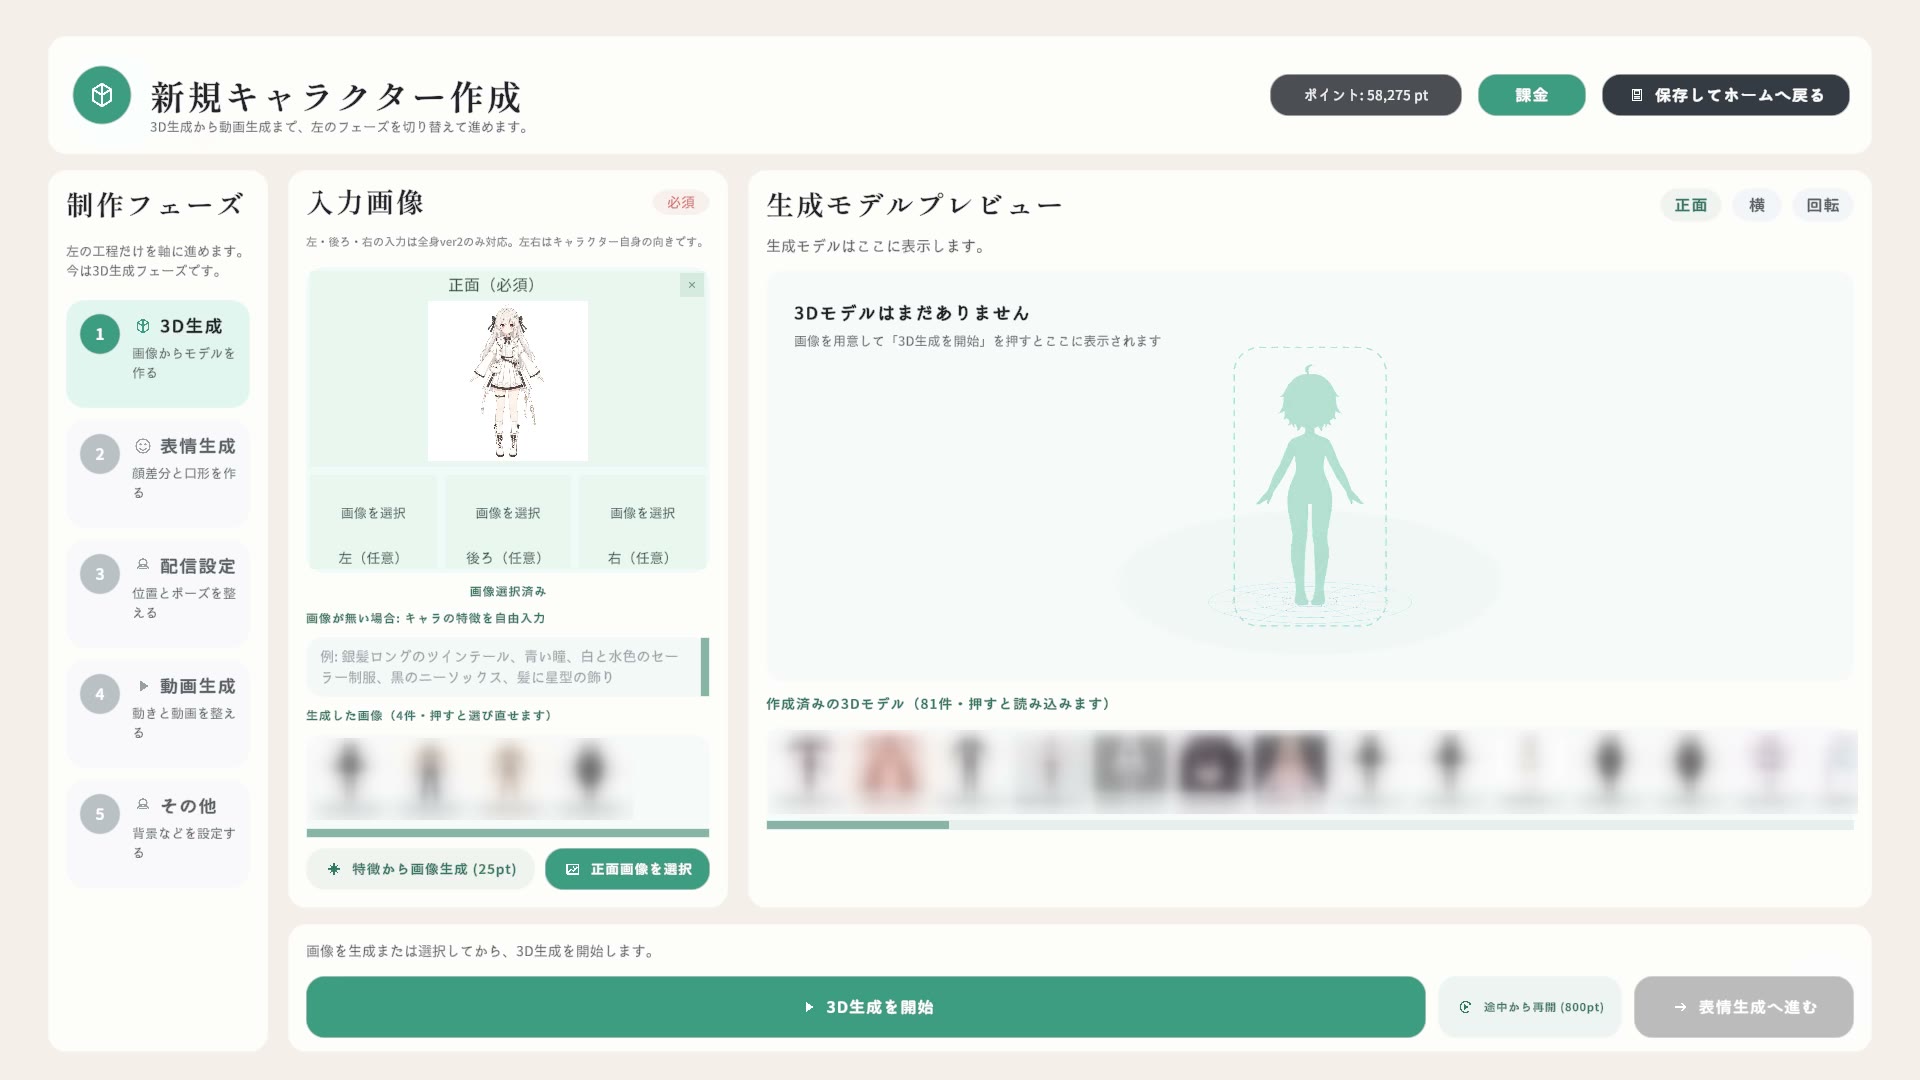
Pick a front image, press 「3D生成を開始」 (start 3D generation), then choose a mode. Full body ver1, Full body ver3 and Bust support only the front image; remove any left, back or right images using ×. Full body ver2 also accepts optional left, back and right images. Full body ver1 (not recommended): 800 pt; Full body ver2 (not recommended): 2500 pt; Full body ver3 (recommended): 800 pt; Bust: 800 pt. All use paid points. Ver1 generates the whole body together. Ver3 also generates the whole body as a single 3D model, but paints the chest-up area and the rest of the body separately, so the face — eyes, hair and so on — comes out in finer detail. It also suits full-body streaming, and takes about 15 minutes to finish. Ver2 generates the head, hair and body separately; adjust the head size and position in the preview, then check the neck connection before rigging. *Full body ver2: about 30% of generations currently stop with an error before they finish. In that case, your points are returned or we resolve it through a support inquiry. After rigging, select Done to save the model. The final review does not offer regeneration or cancellation with a point refund. Bust focuses on the face and chest, without the lower body or hands.
Full body ver2 only: when adjusting the head position
Everything below the neck on the head model (shoulders, clothing, etc.; hair is kept) is removed when connecting. Place the face and neck directly above the neck of the body (you don't need to match the head model's shoulders or clothing).
Always check the position from the side as well, not just from the front. Even when it looks right from the front, the head may be too far forward or back when seen from the side.
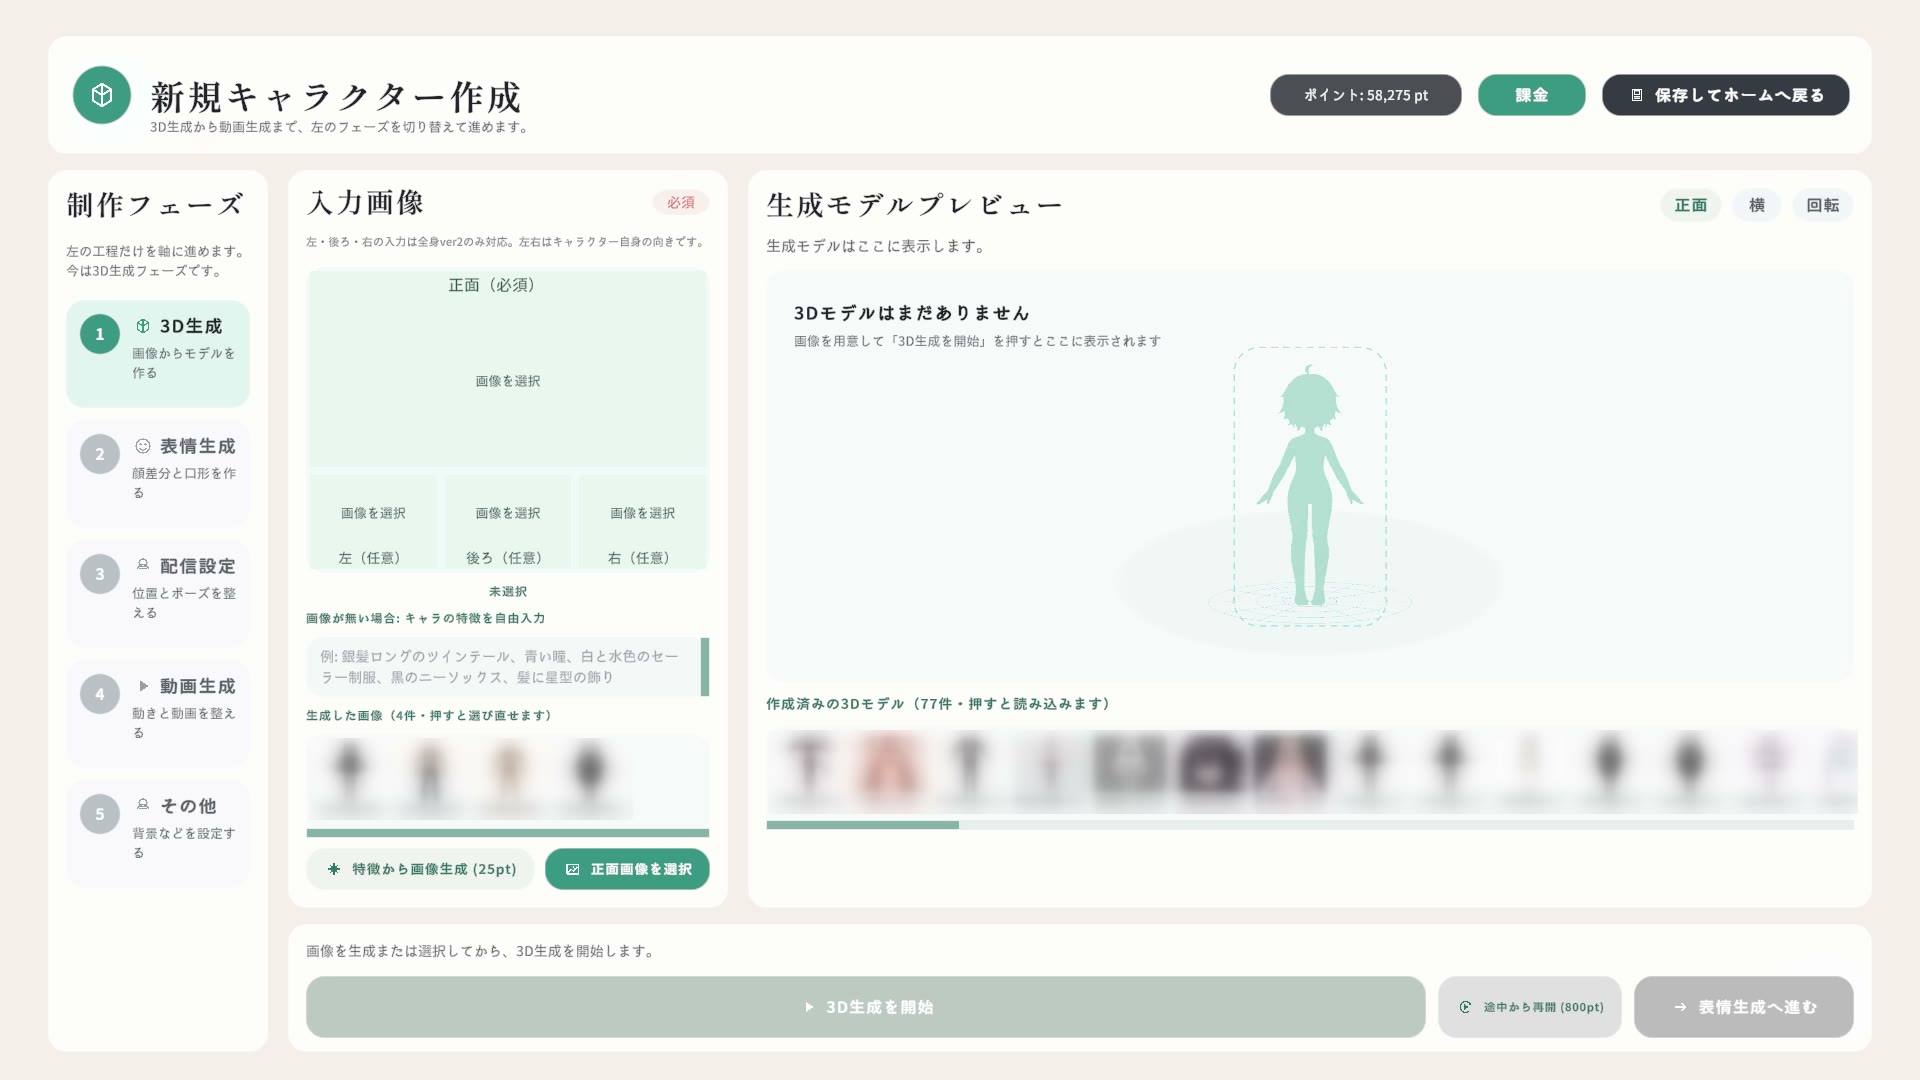
Load an illustration from 「画像を選択」 (choose image). With no image, you can instead describe the character in words and use 「特徴から画像生成」 (generate image from description) for 25 points.Once an image is chosen, the app first checks that it has not already been published online (「画像を確認中」, checking image), and then 「3D生成を開始」 (start 3D generation) at the bottom becomes available.
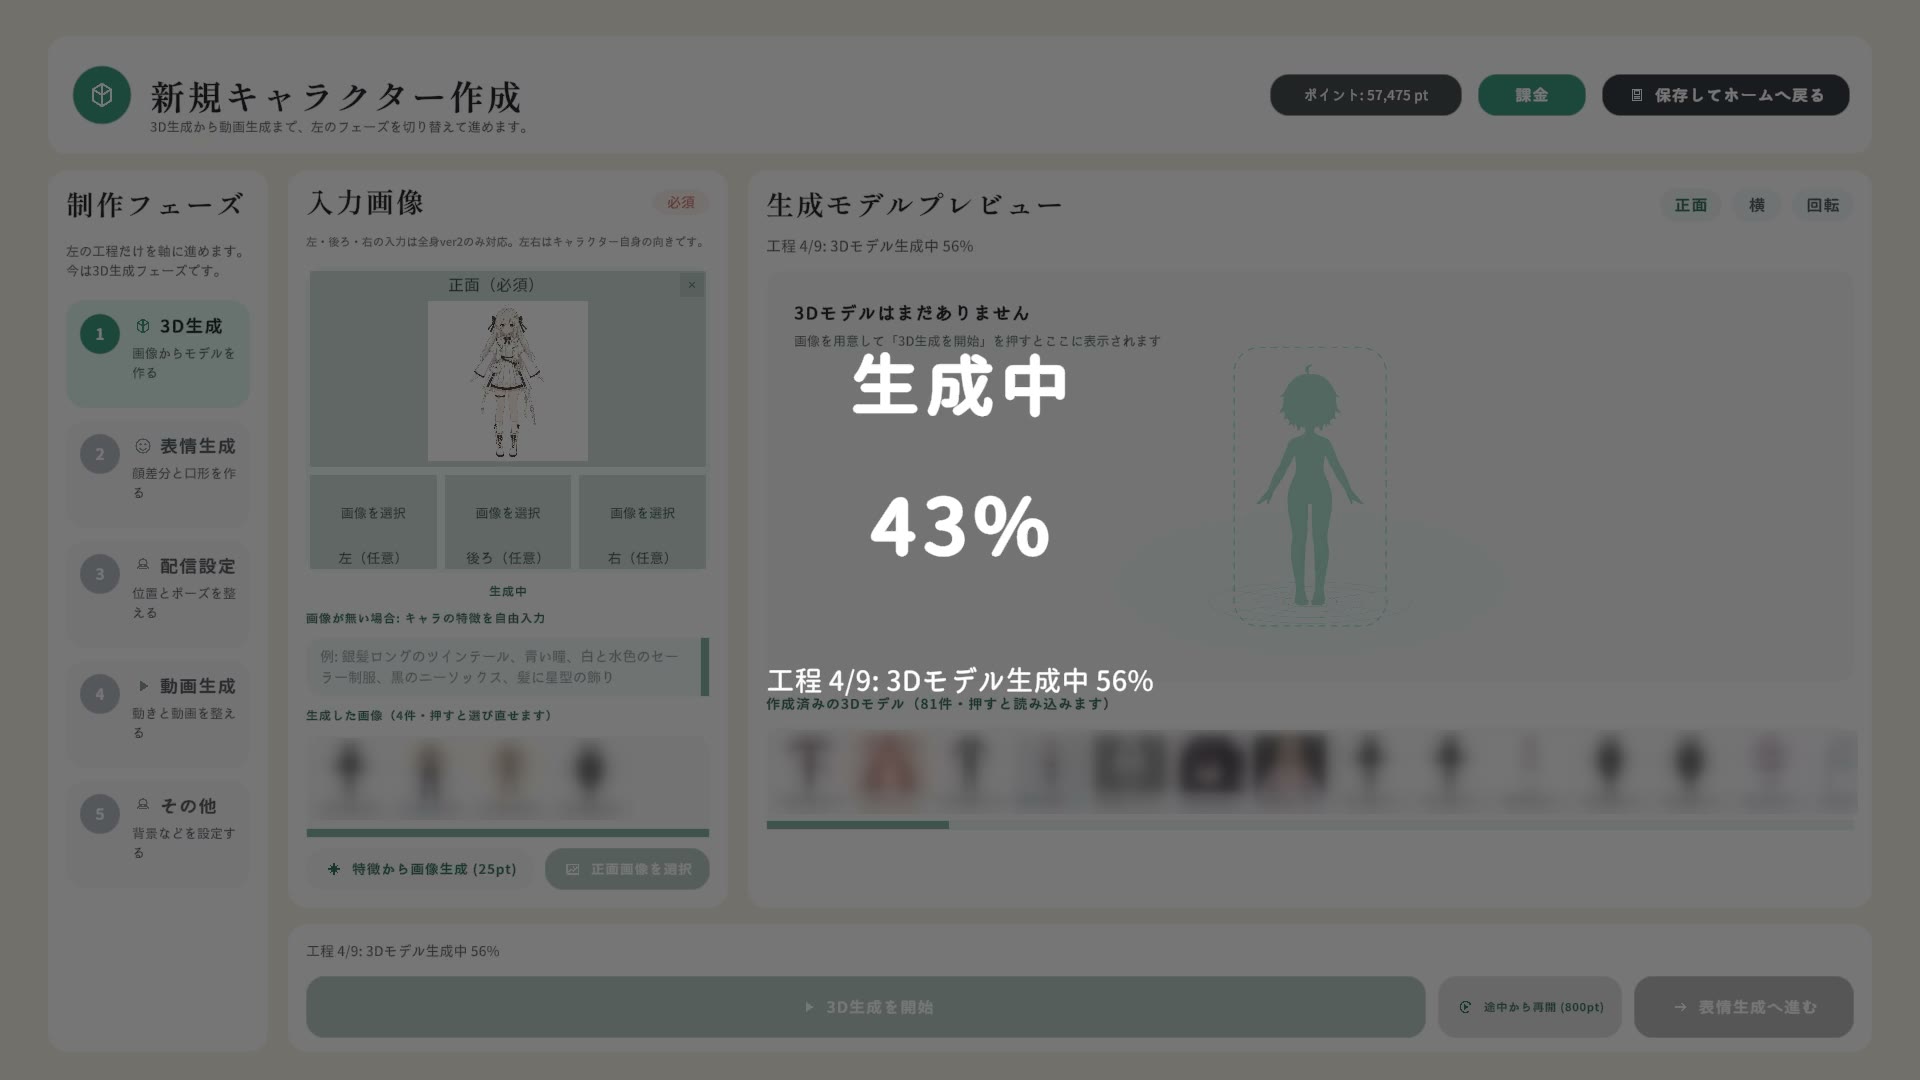
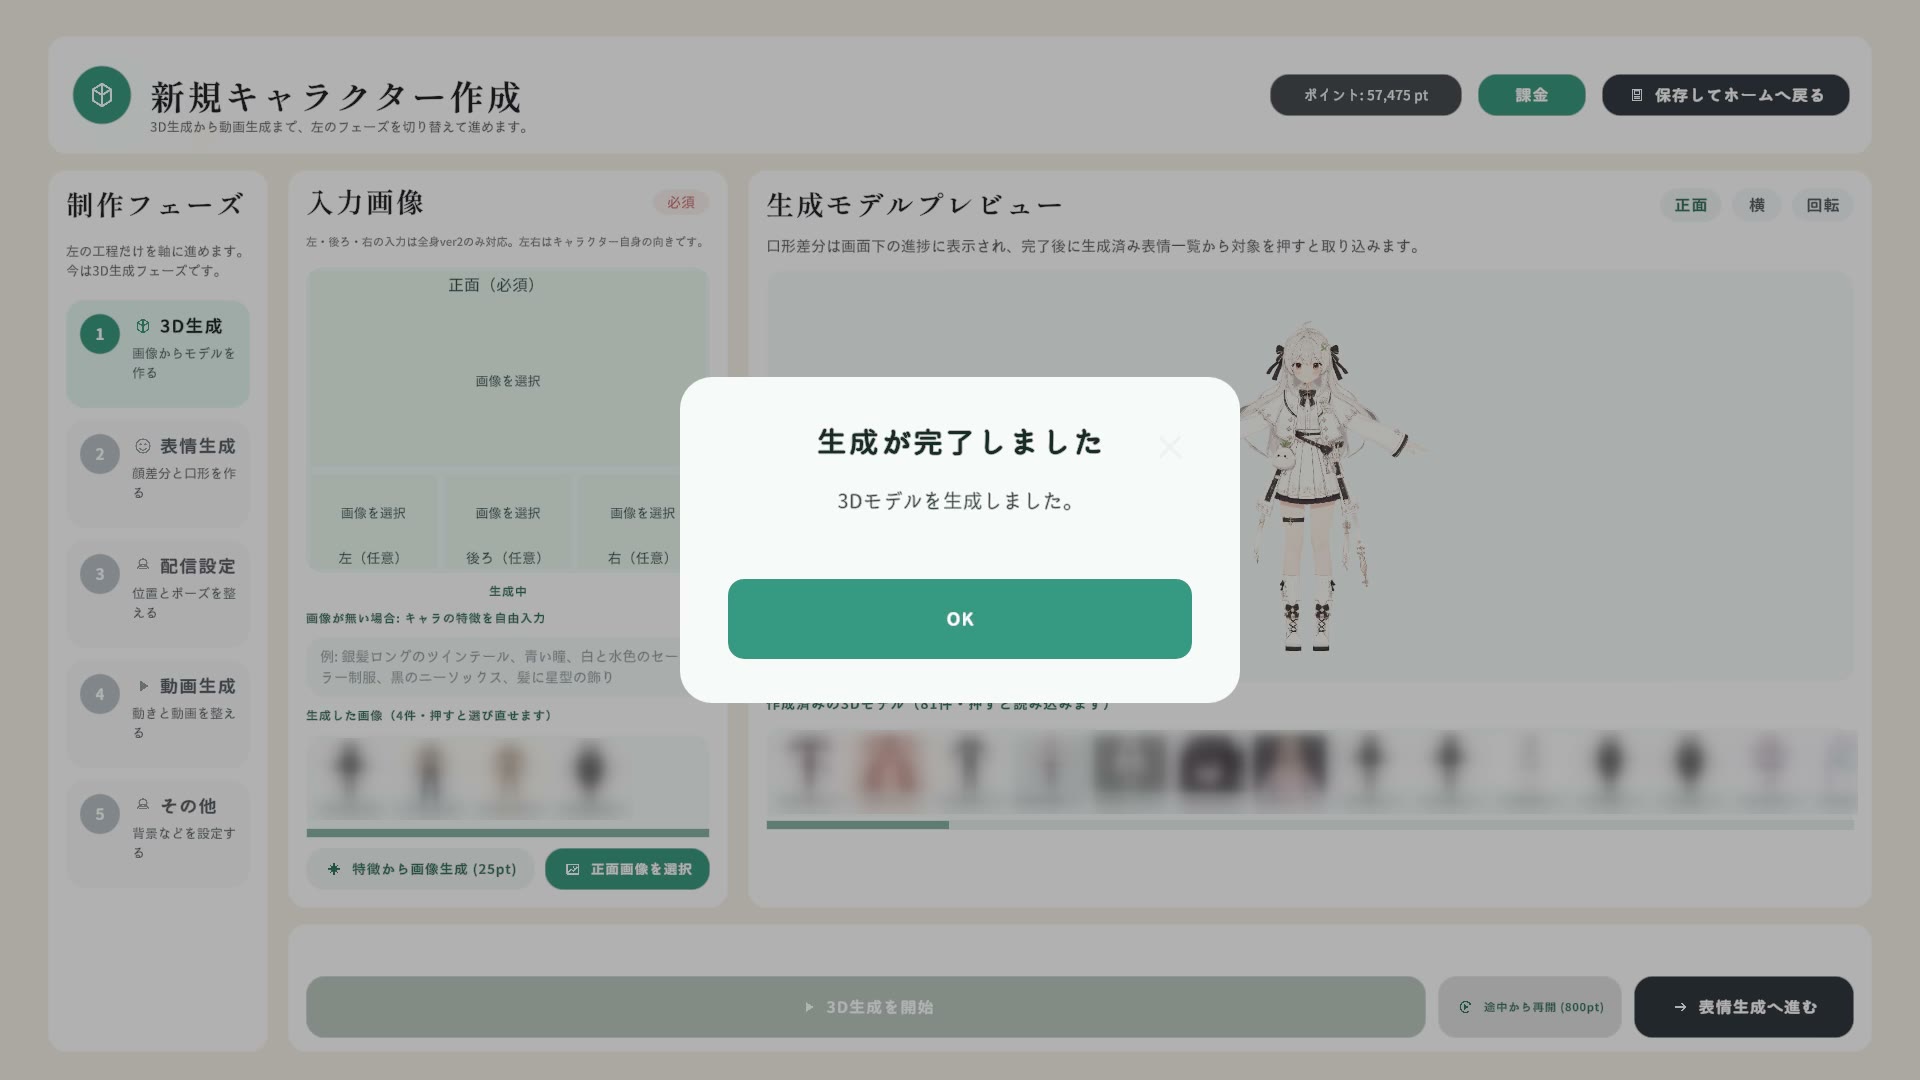
While it runs, the progress and the current step are shown — analysing the character, isolating it, generating three views, building the 3D model, rigging, generating the idle animation (this screen is Full body ver1). Ver2 also stops midway to let you place the head and check the neck connection.Check the result on the large review screen and press 「完了」 (done); a completion dialog appears. Press OK and the model loads.
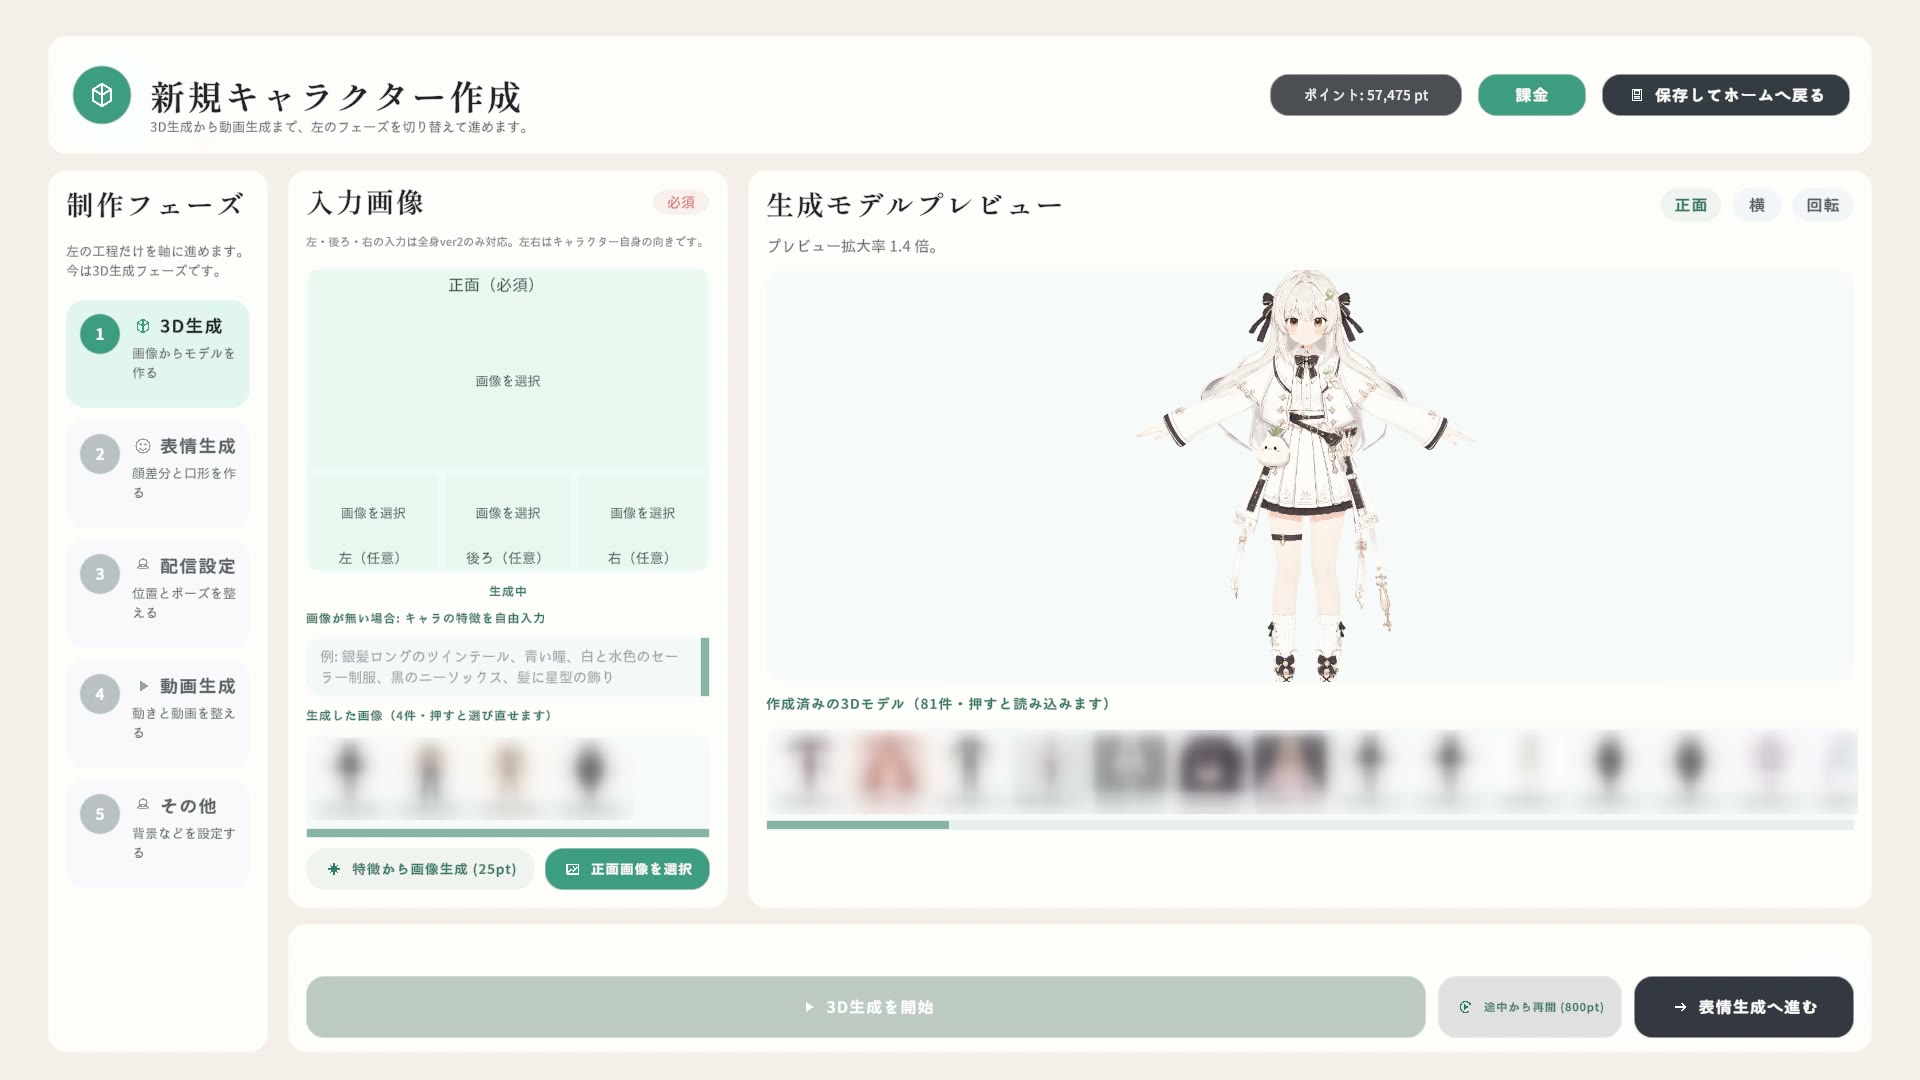
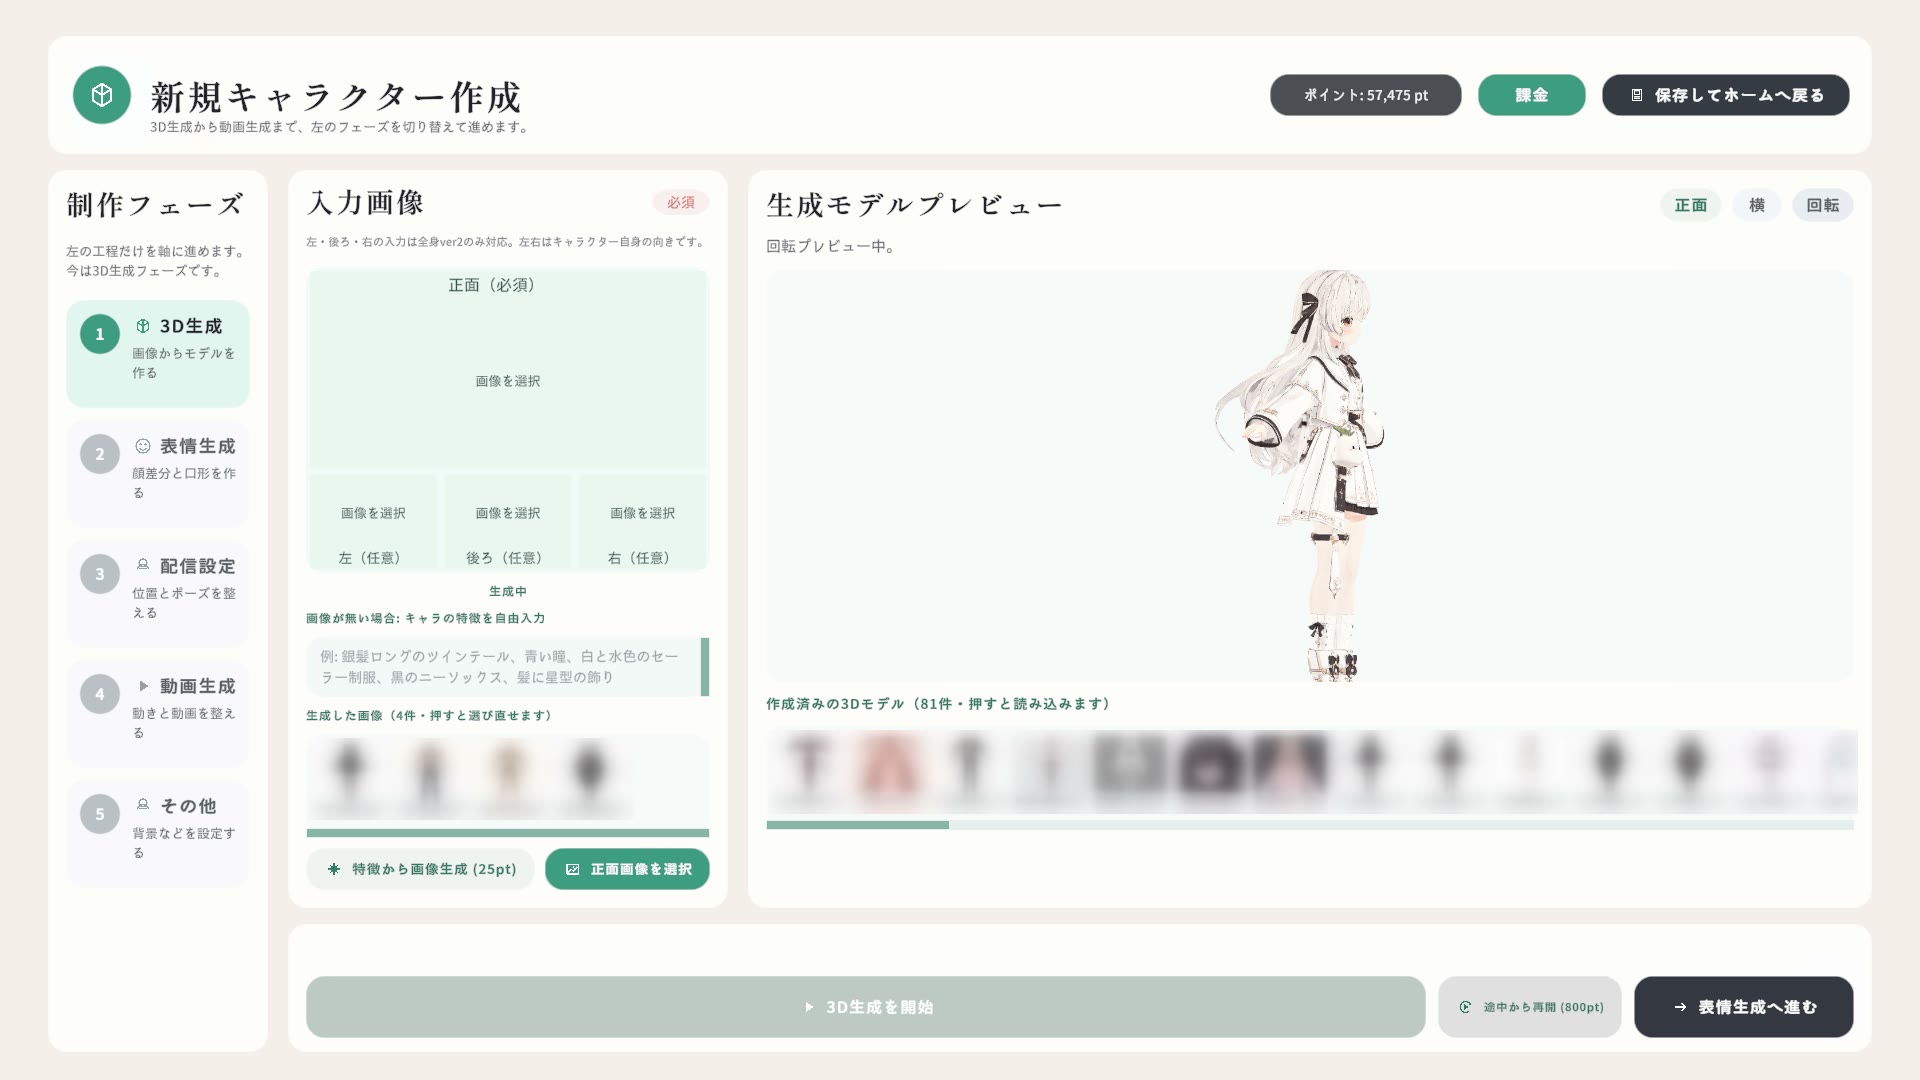
The model preview. The buttons at the top right switch between 正面 / 横 / 回転 (front / side / turntable) so you can check the result.Check all 360° in turntable view. The 「作成済みの3Dモデル」 (models you have made) strip below loads earlier models.
About points: 3D models, expression sets, backgrounds and clips are generated in the cloud and all of them spend paid points. Your balance is always shown at the top right, and you can buy more from the shop. If a generation fails, the points are returned automatically.
03
Generate expressions and mouth shapes PHASE 2 · EXPRESSIONS
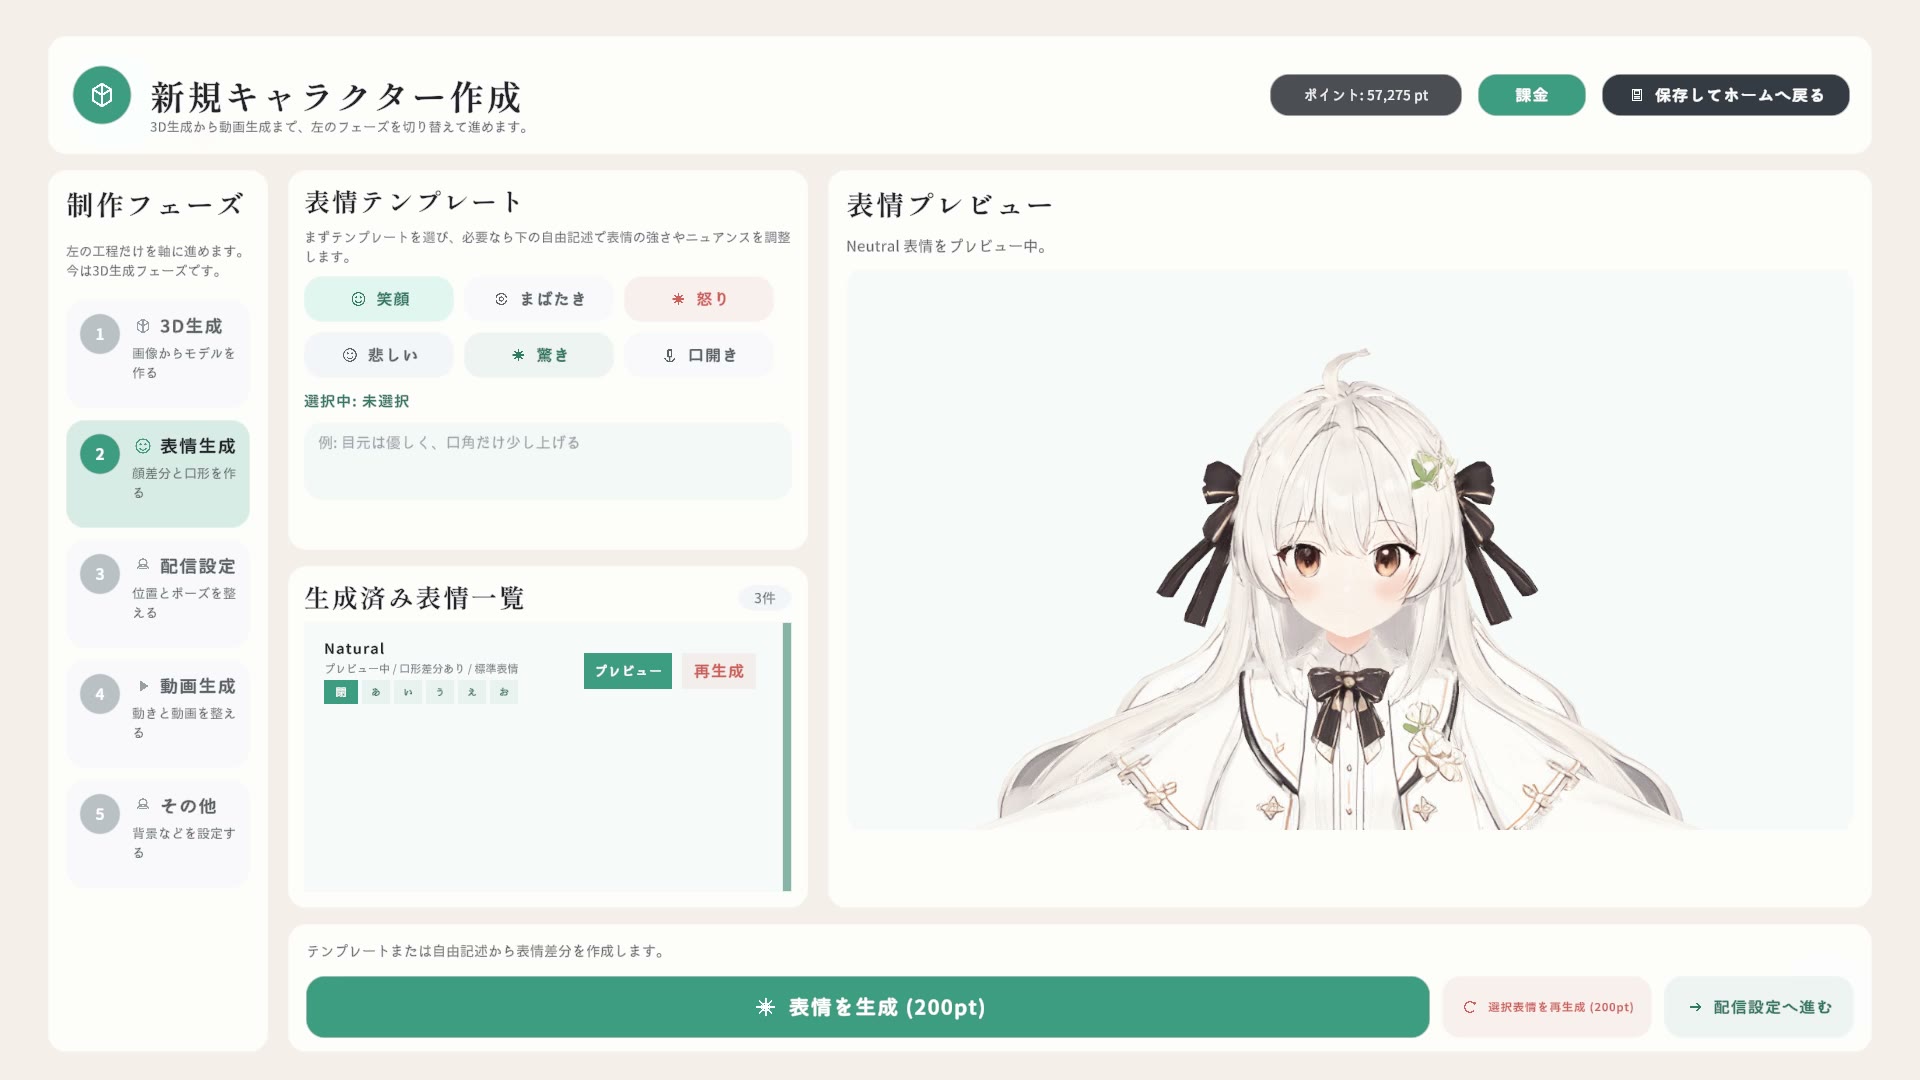
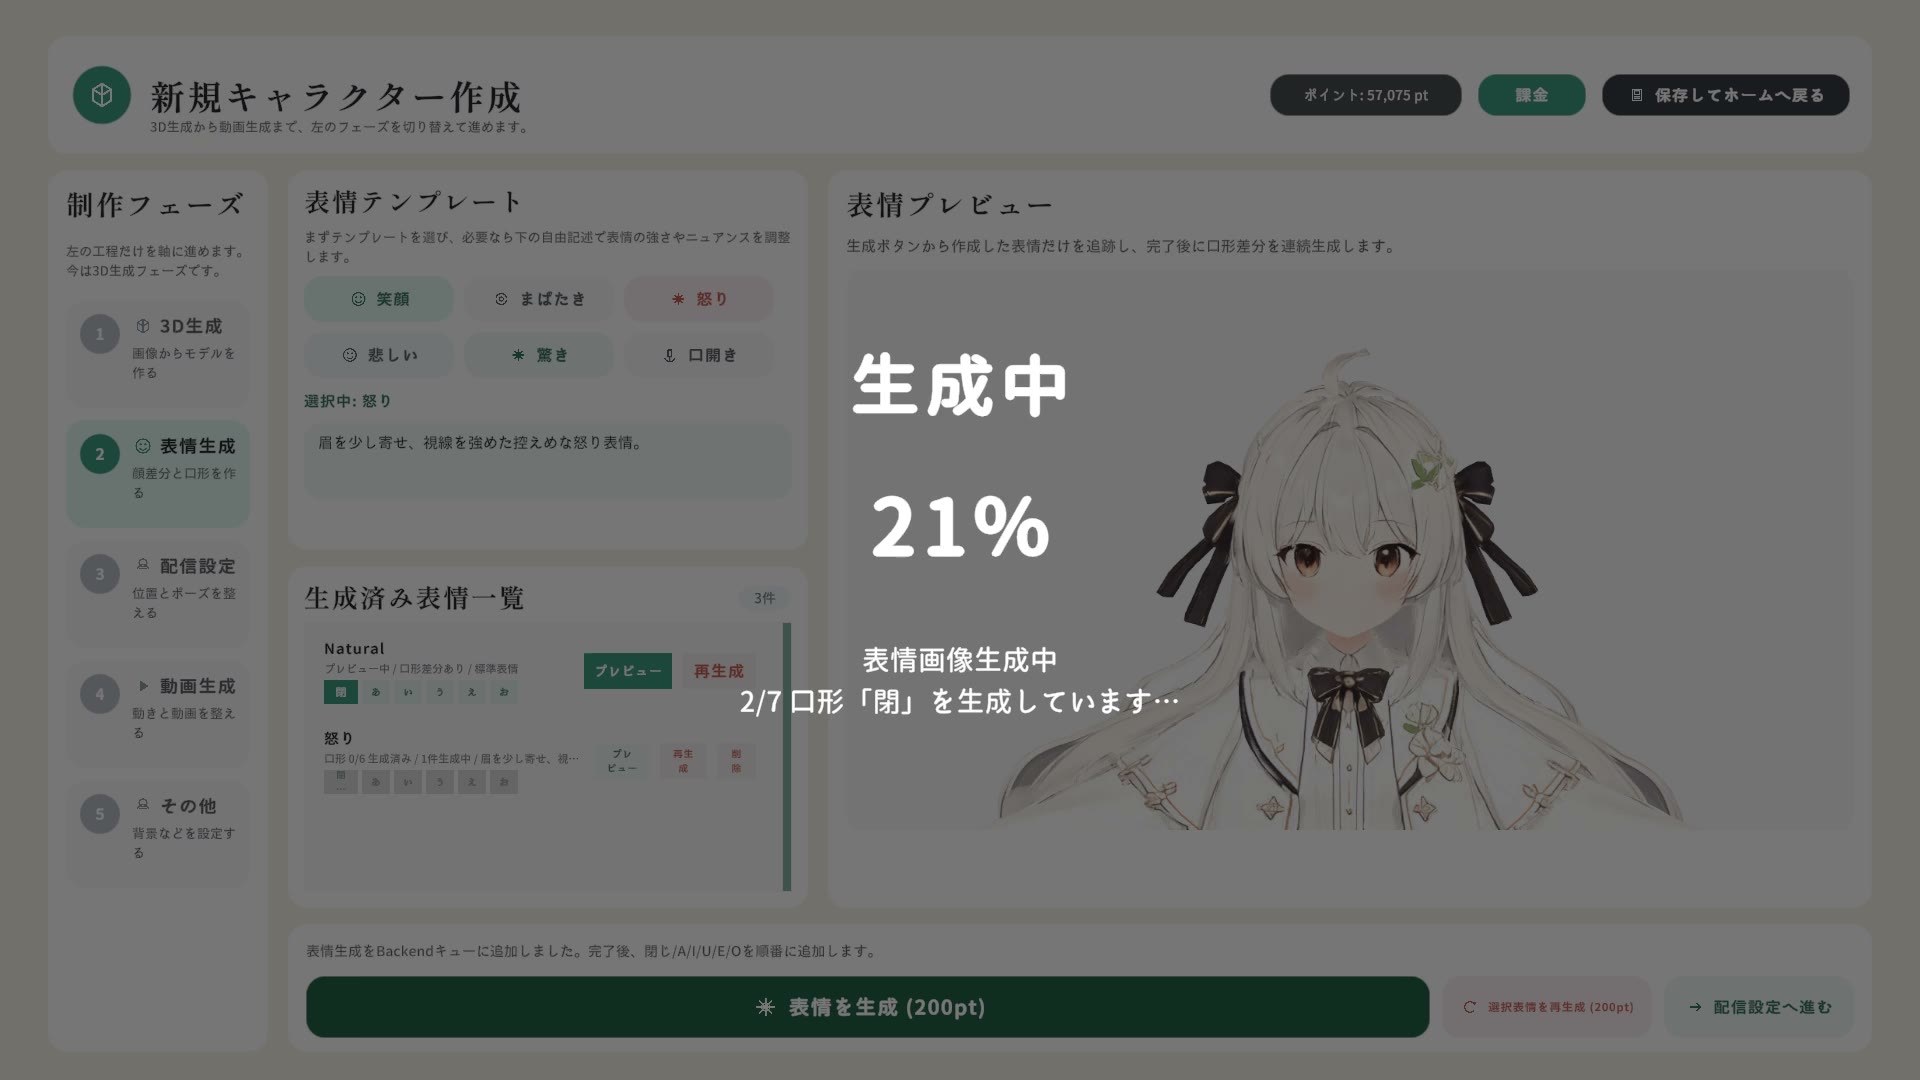
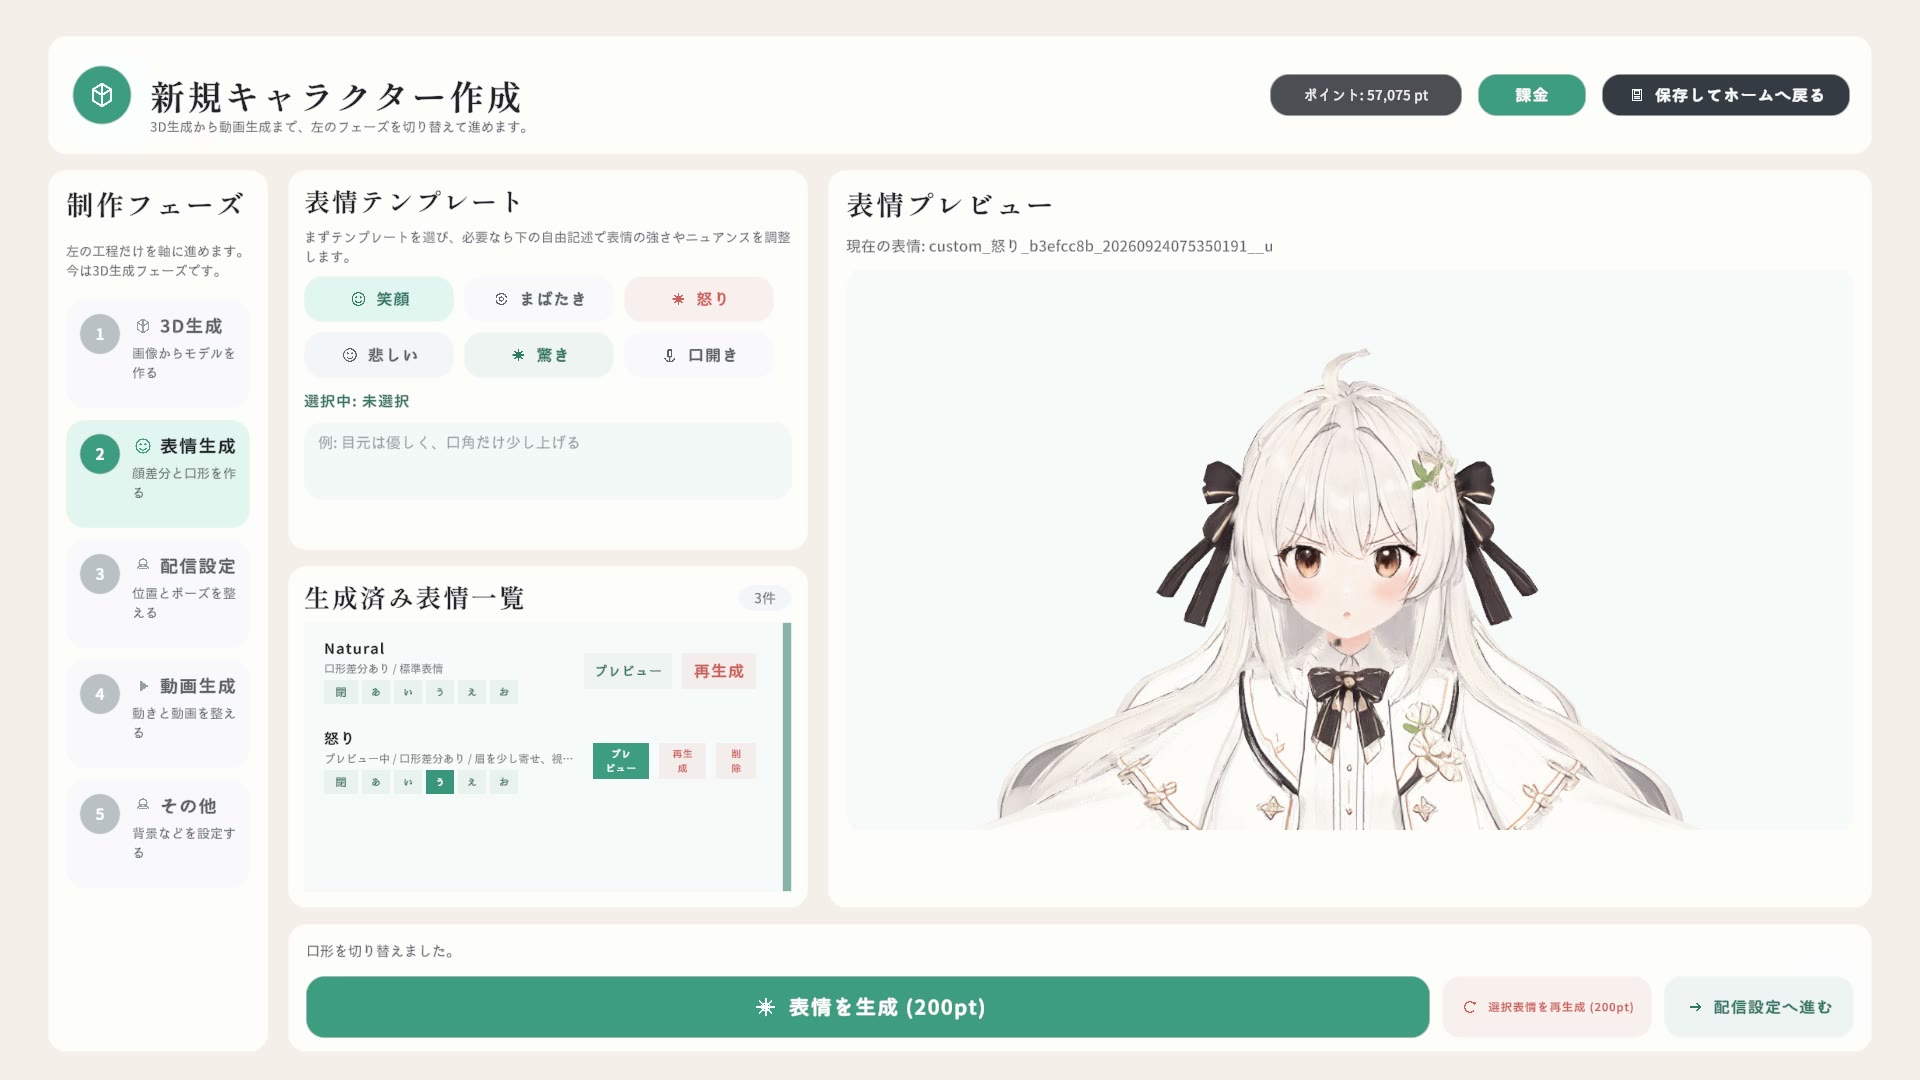
Pick an expression template — smiling, angry, sad and so on — and press 「表情を生成」 (generate expression). The app produces the face variant together with the mouth shapes used for lip sync (closed, plus every vowel). Each set costs 200 paid points.
Pick an expression template. Everything already generated is listed below.Generating. The face variant and its mouth-shape set are produced one after another.
Check the result in the preview. The expressions you make here are what the automatic expression switching and lip sync use during a stream.
04
Set the framing and pose PHASE 3 · STREAM SETUP
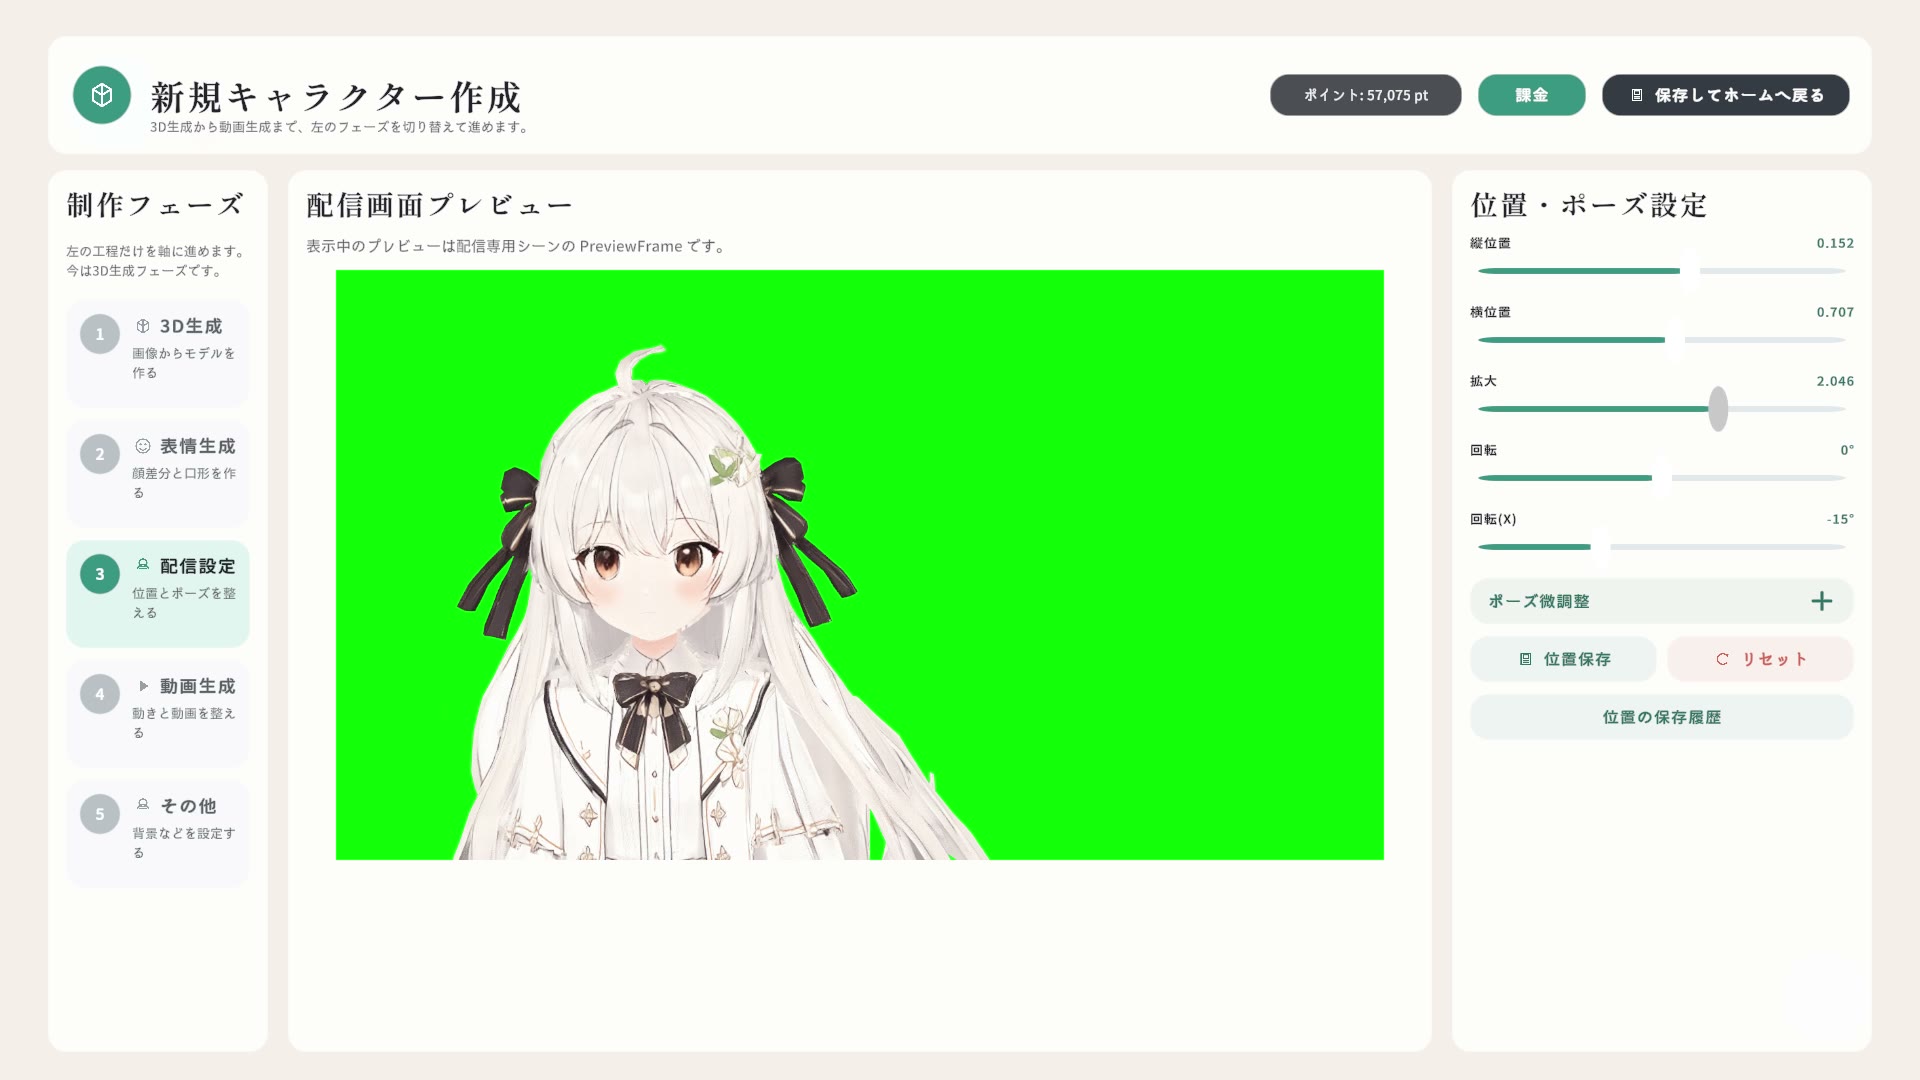
Decide how your character sits in frame while previewing the real stream view. The background defaults to a green screen, so you can set everything up for chroma keying in OBS.
The sliders on the right adjust vertical position, horizontal position, scale and rotation. 「ポーズ微調整」 (fine-tune pose) opens finer controls. When you are happy, 「位置保存」 (save position) stores the current framing. The saved framing is used as-is in the stream view, and 「位置の保存履歴」 (saved positions) brings earlier ones back.
05
Generate a clip PHASE 4 · CLIPS
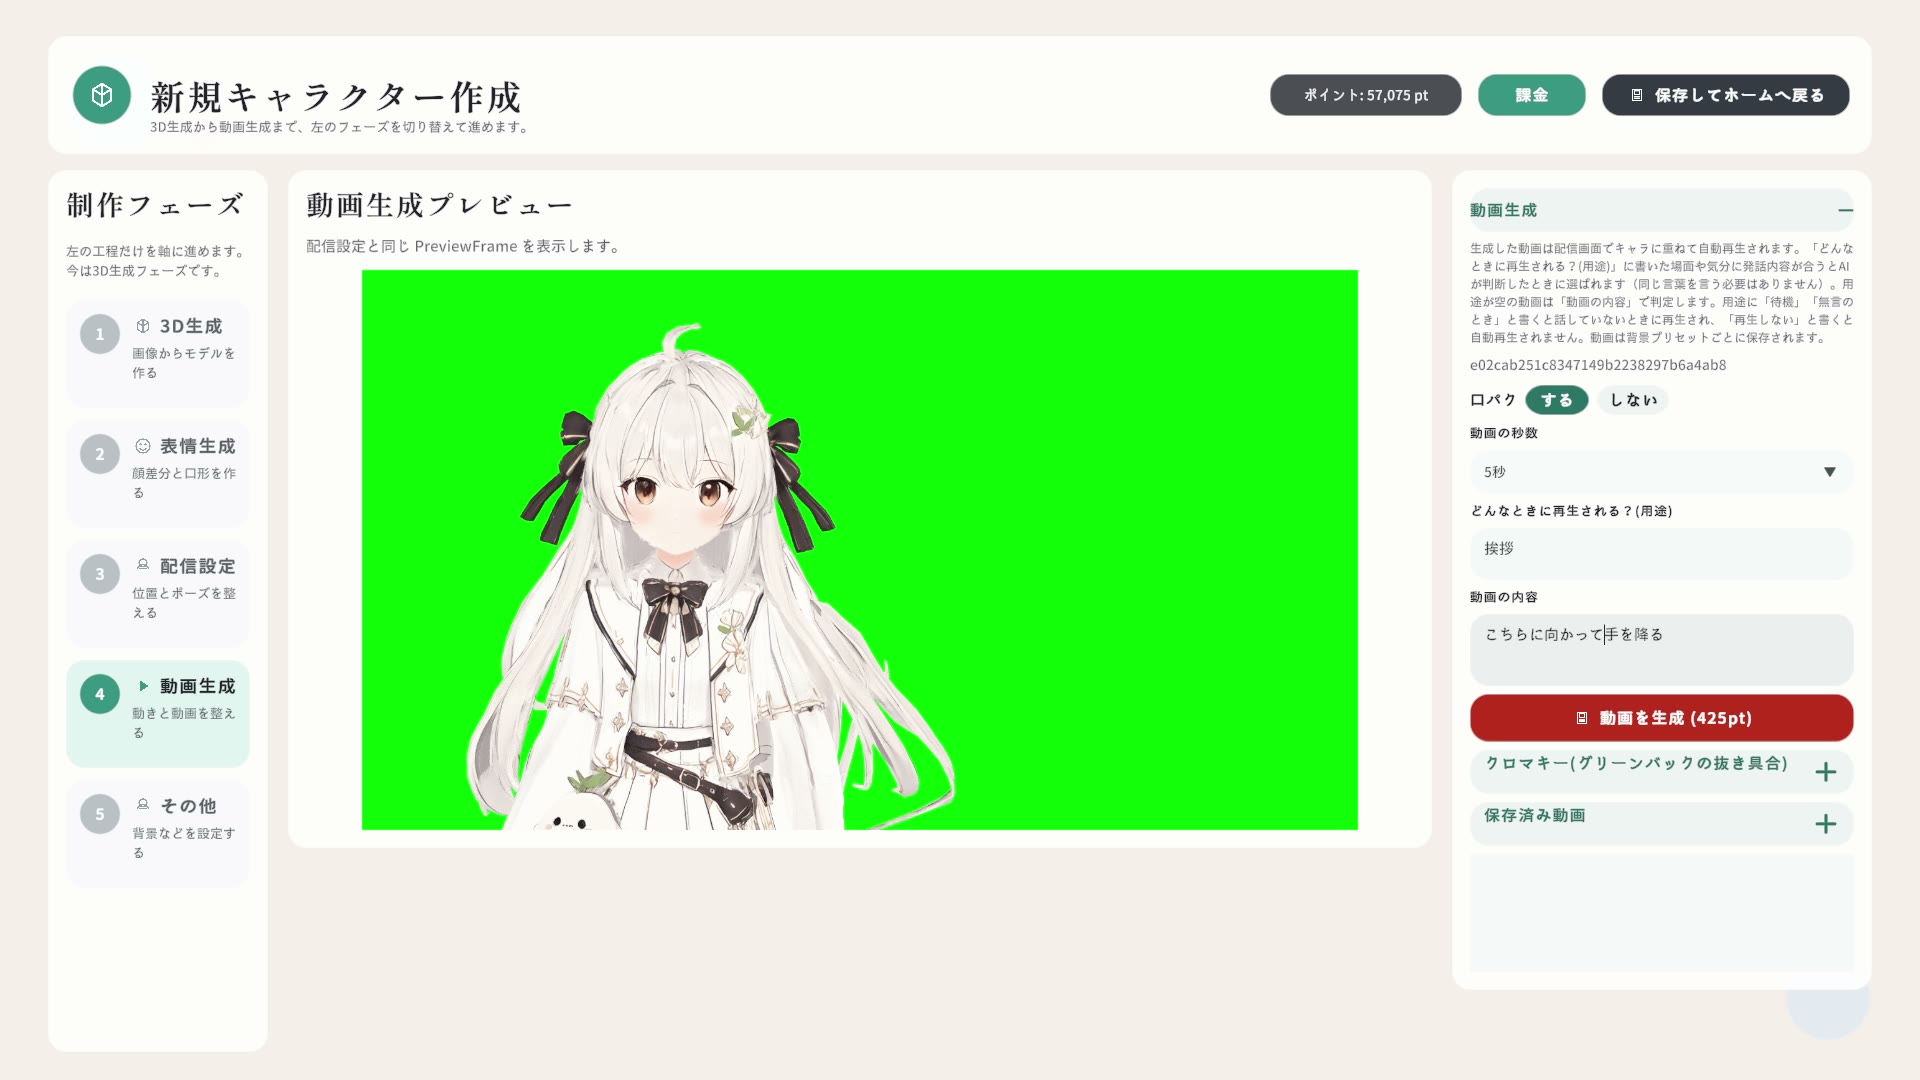
Describe the motion in words — "wave a hand and give a small bow", for example — to generate a short clip of your character. Generated clips are layered over the character in the stream view and play automatically.
In the right-hand panel set lip sync on/off, length, when to play it, and the motion, then press 「動画を生成」 (generate video). The 用途 (when to play it) field — "greeting", "idle / when silent", "talking about games" — is matched against what you say, and the closest clip is chosen. Write "待機" (idle) and it plays while you are silent.
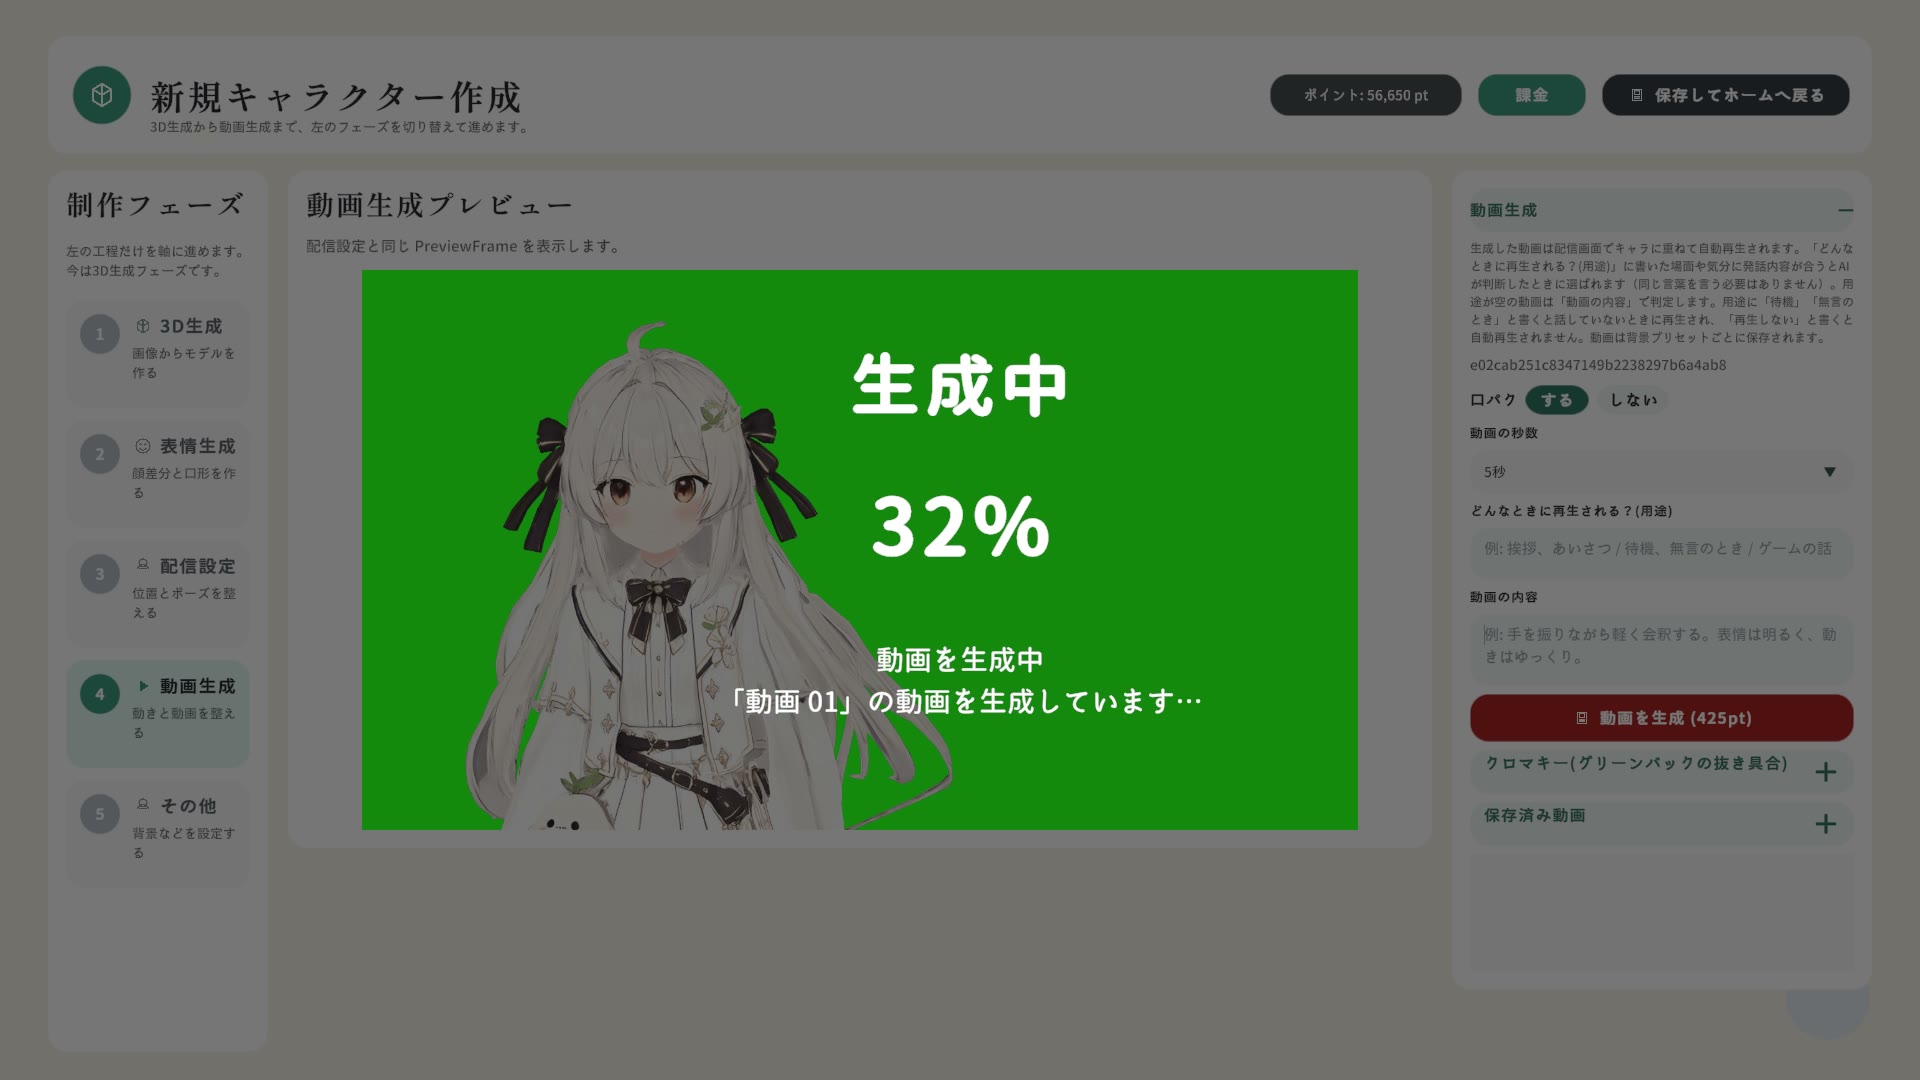
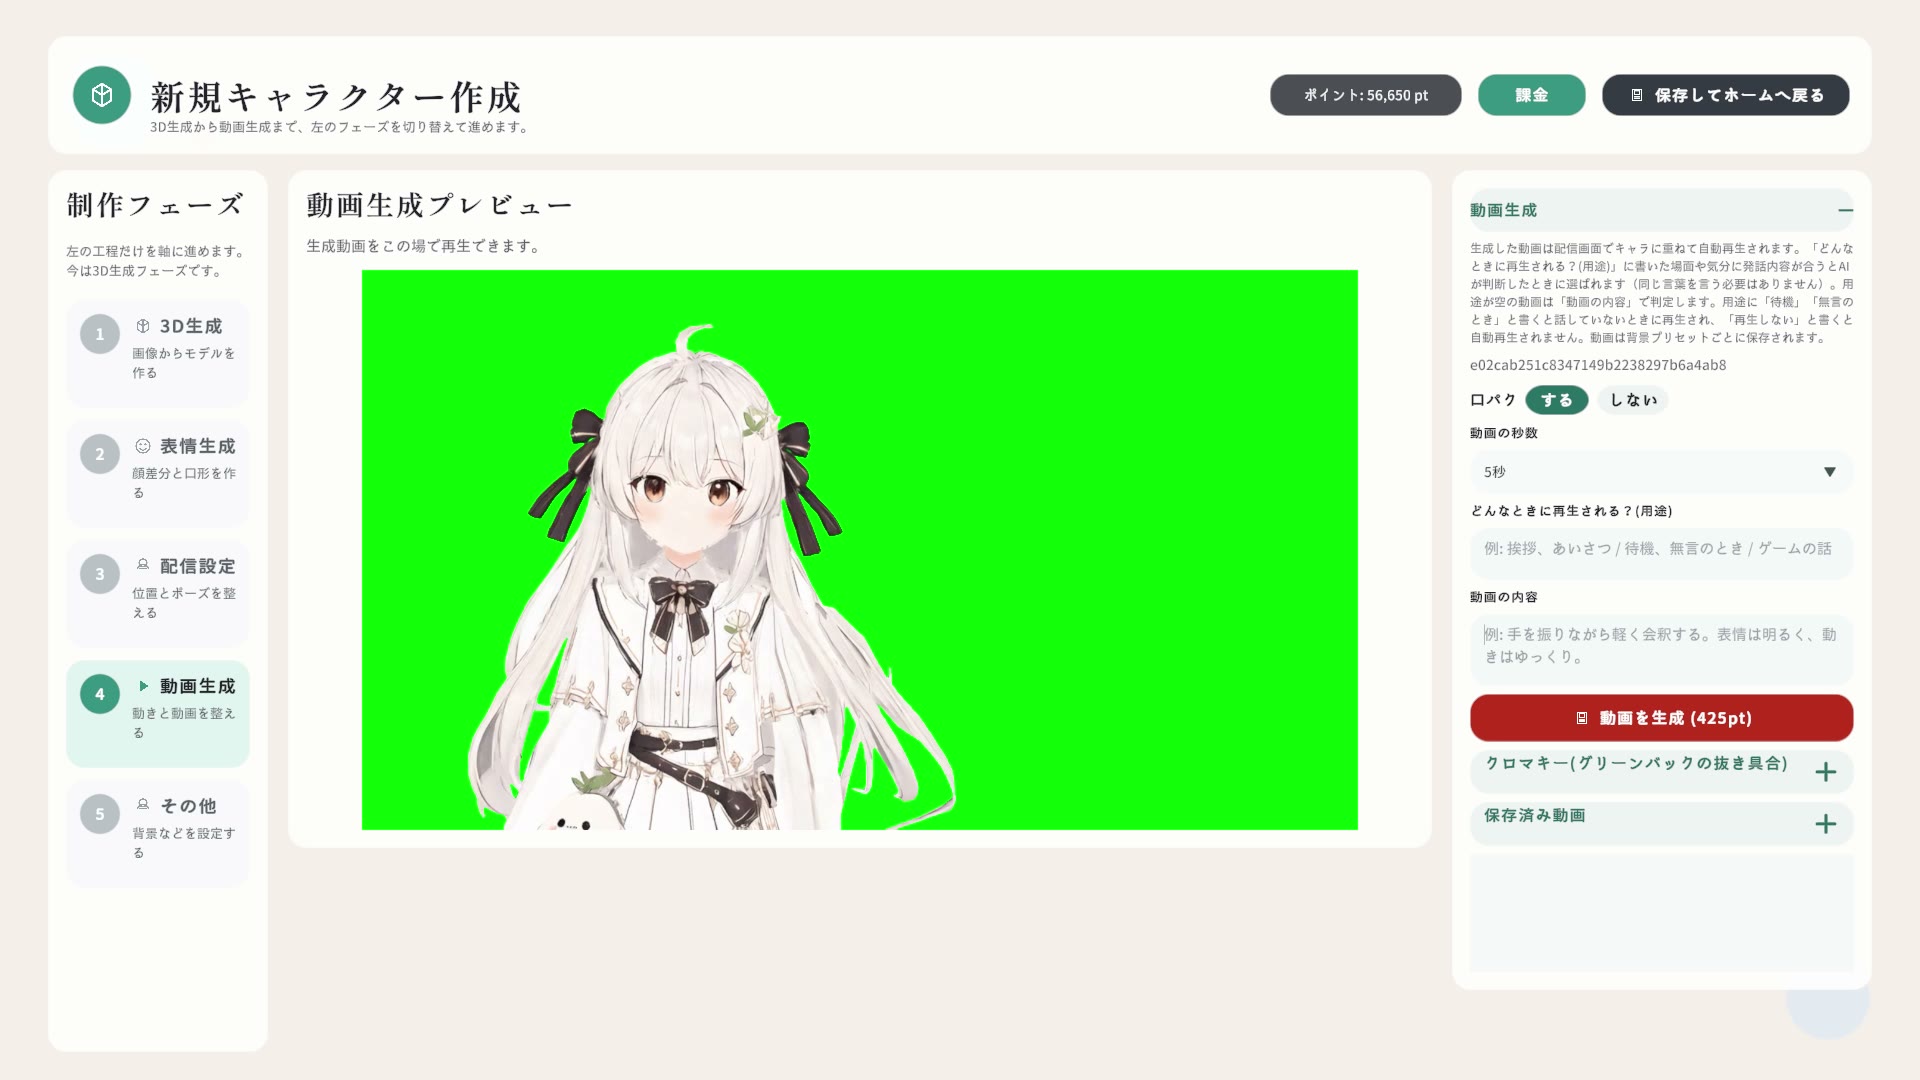
Progress while it generates. It takes a little while to finish.Play the finished clip back on the spot. Generated clips are listed under 「保存済み動画」 (saved clips), where you can replay them or rewrite when they play later. 「クロマキー」 (chroma key) tunes how the green is keyed out.
06
Set the background PHASE 5 · OTHER
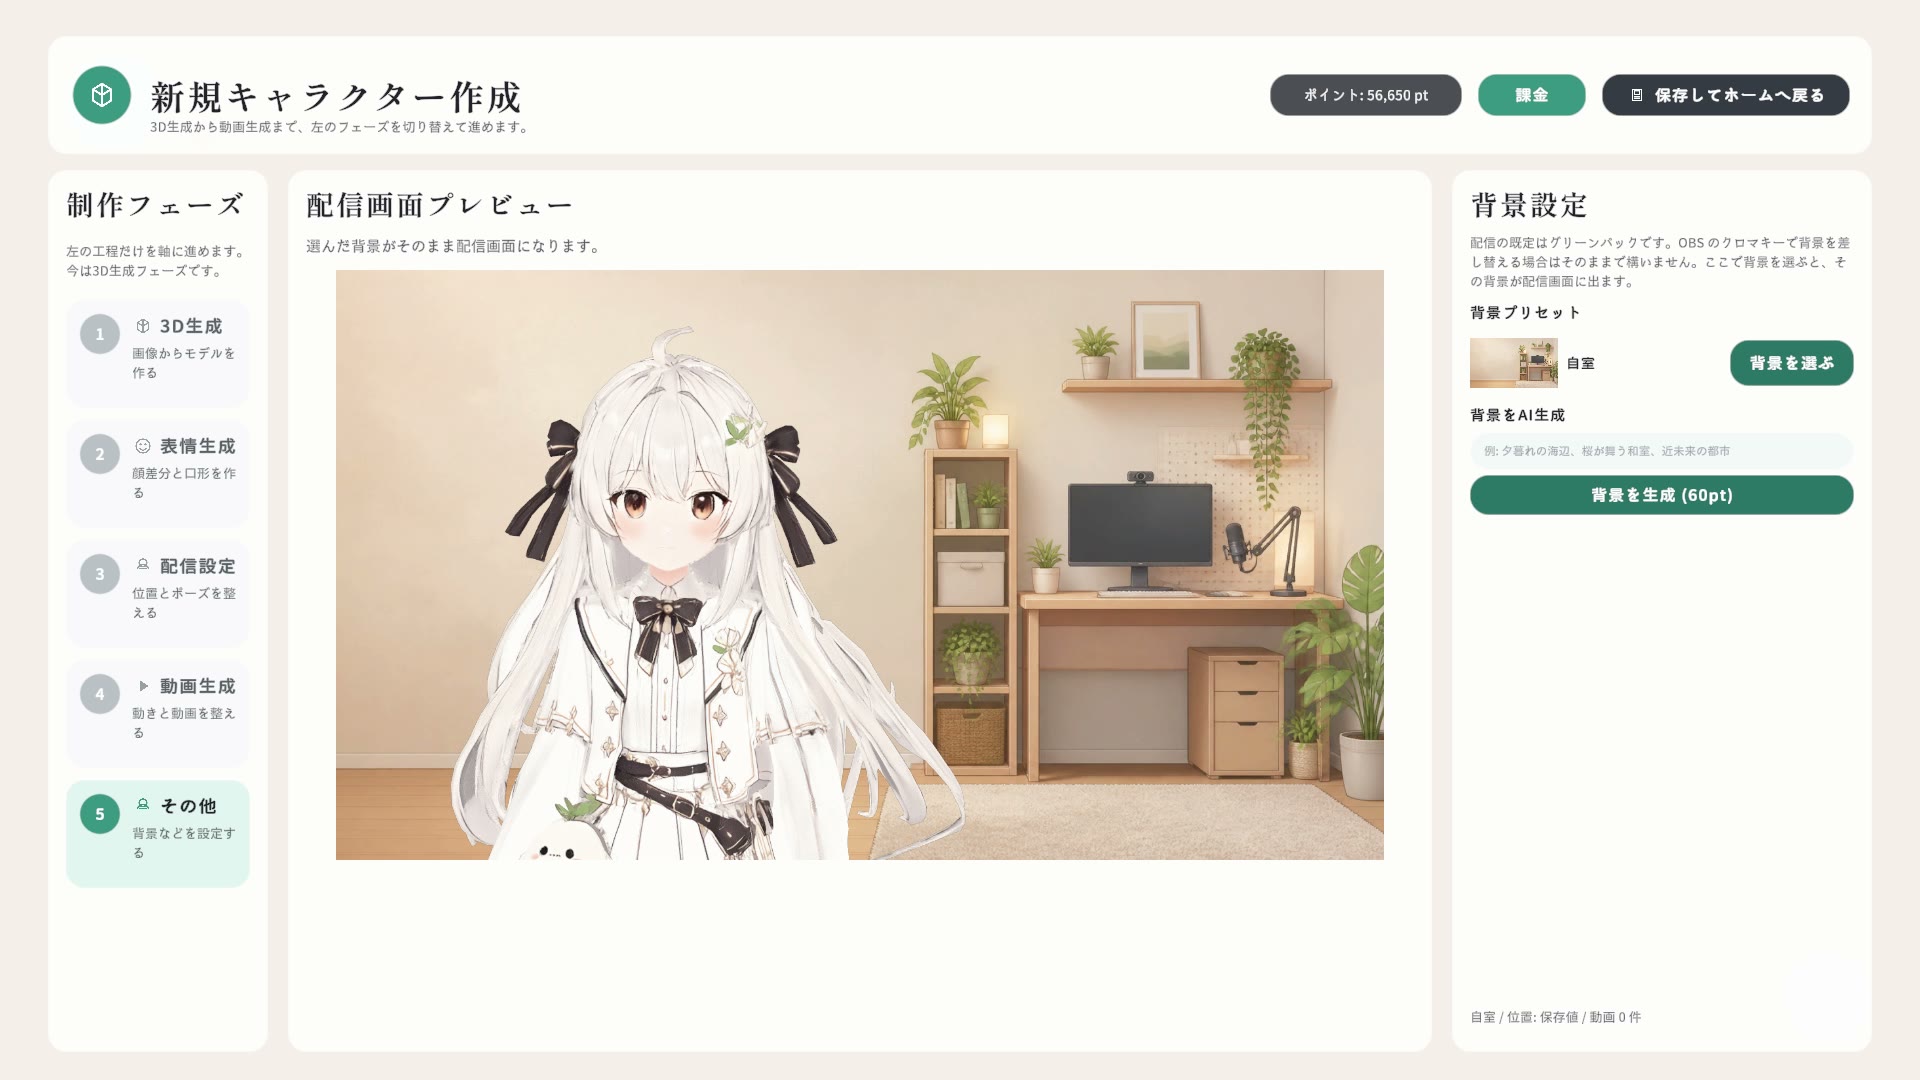
You can stream on the green screen and composite in OBS, or swap in a background inside the app. The bundled backgrounds and loading an image of your own are free; generating one with AI costs 60 paid points. Clips are saved per background.
Pick a background and the stream preview updates immediately.
07
Go live
Back to the home screen and into 「配信」 (stream) mode. Choose a character and the stream view opens. From there, just talk into the mic — lip sync, expression switching and clip playback all run by themselves.
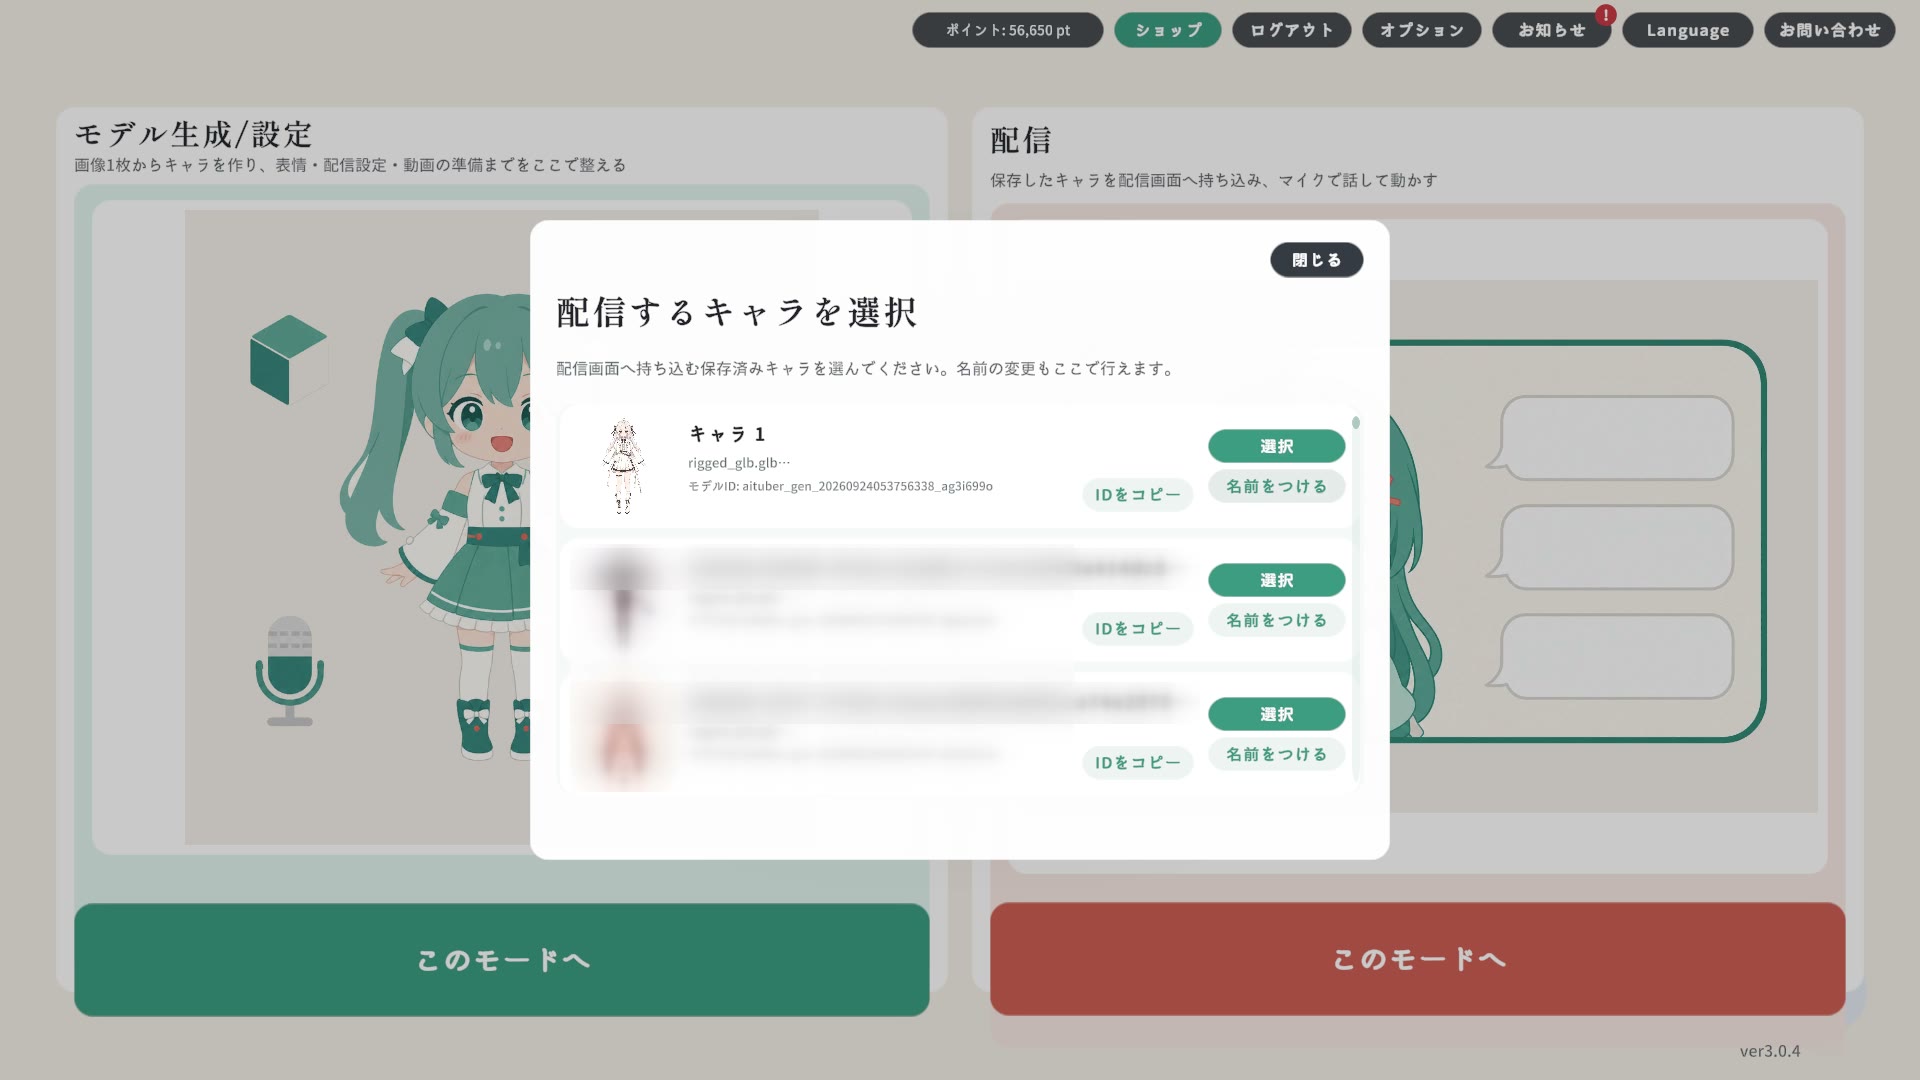
Pick a saved character from 「配信するキャラを選択」 (choose a character to stream).
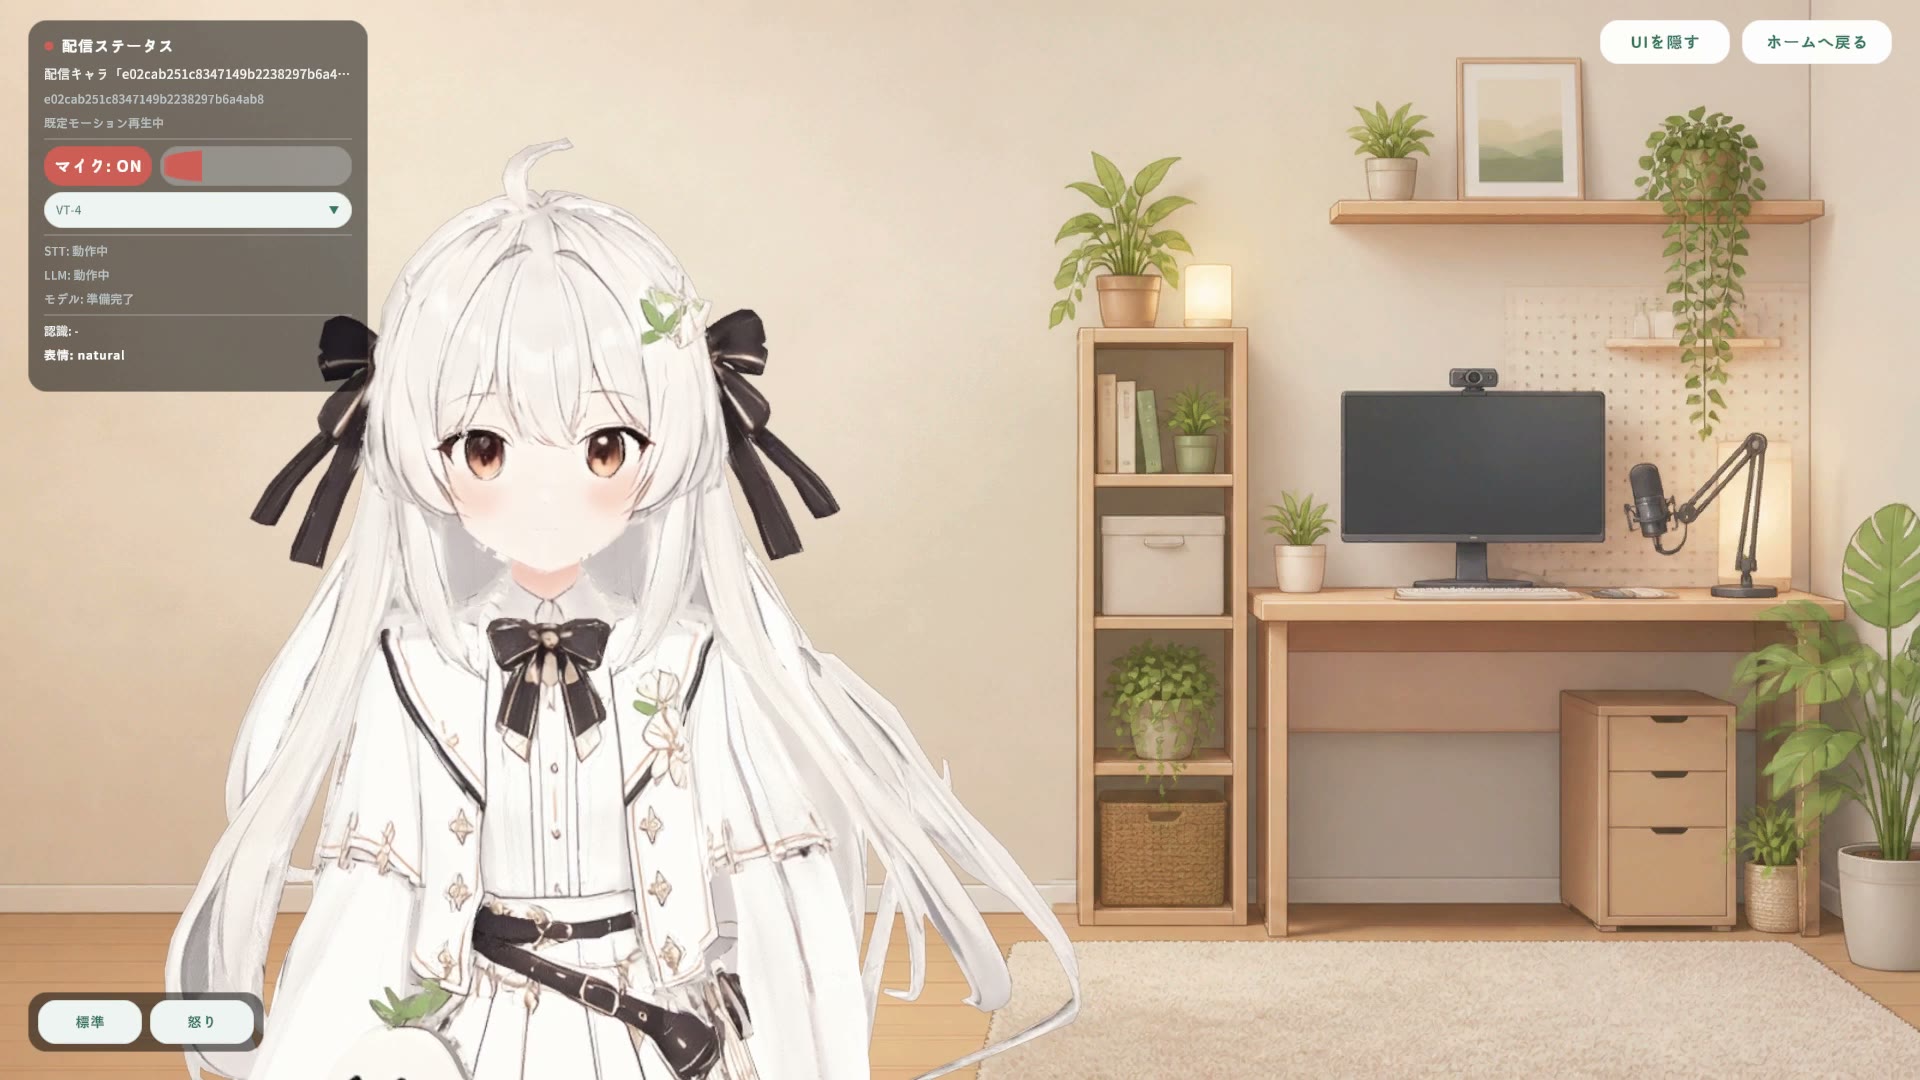
The 配信ステータス (stream status) panel at the top left shows the mic on/off, the input device, the state of speech recognition (STT) and the AI (LLM), the recognised text, and the current expression. The expression palette at the bottom left switches expressions by hand.
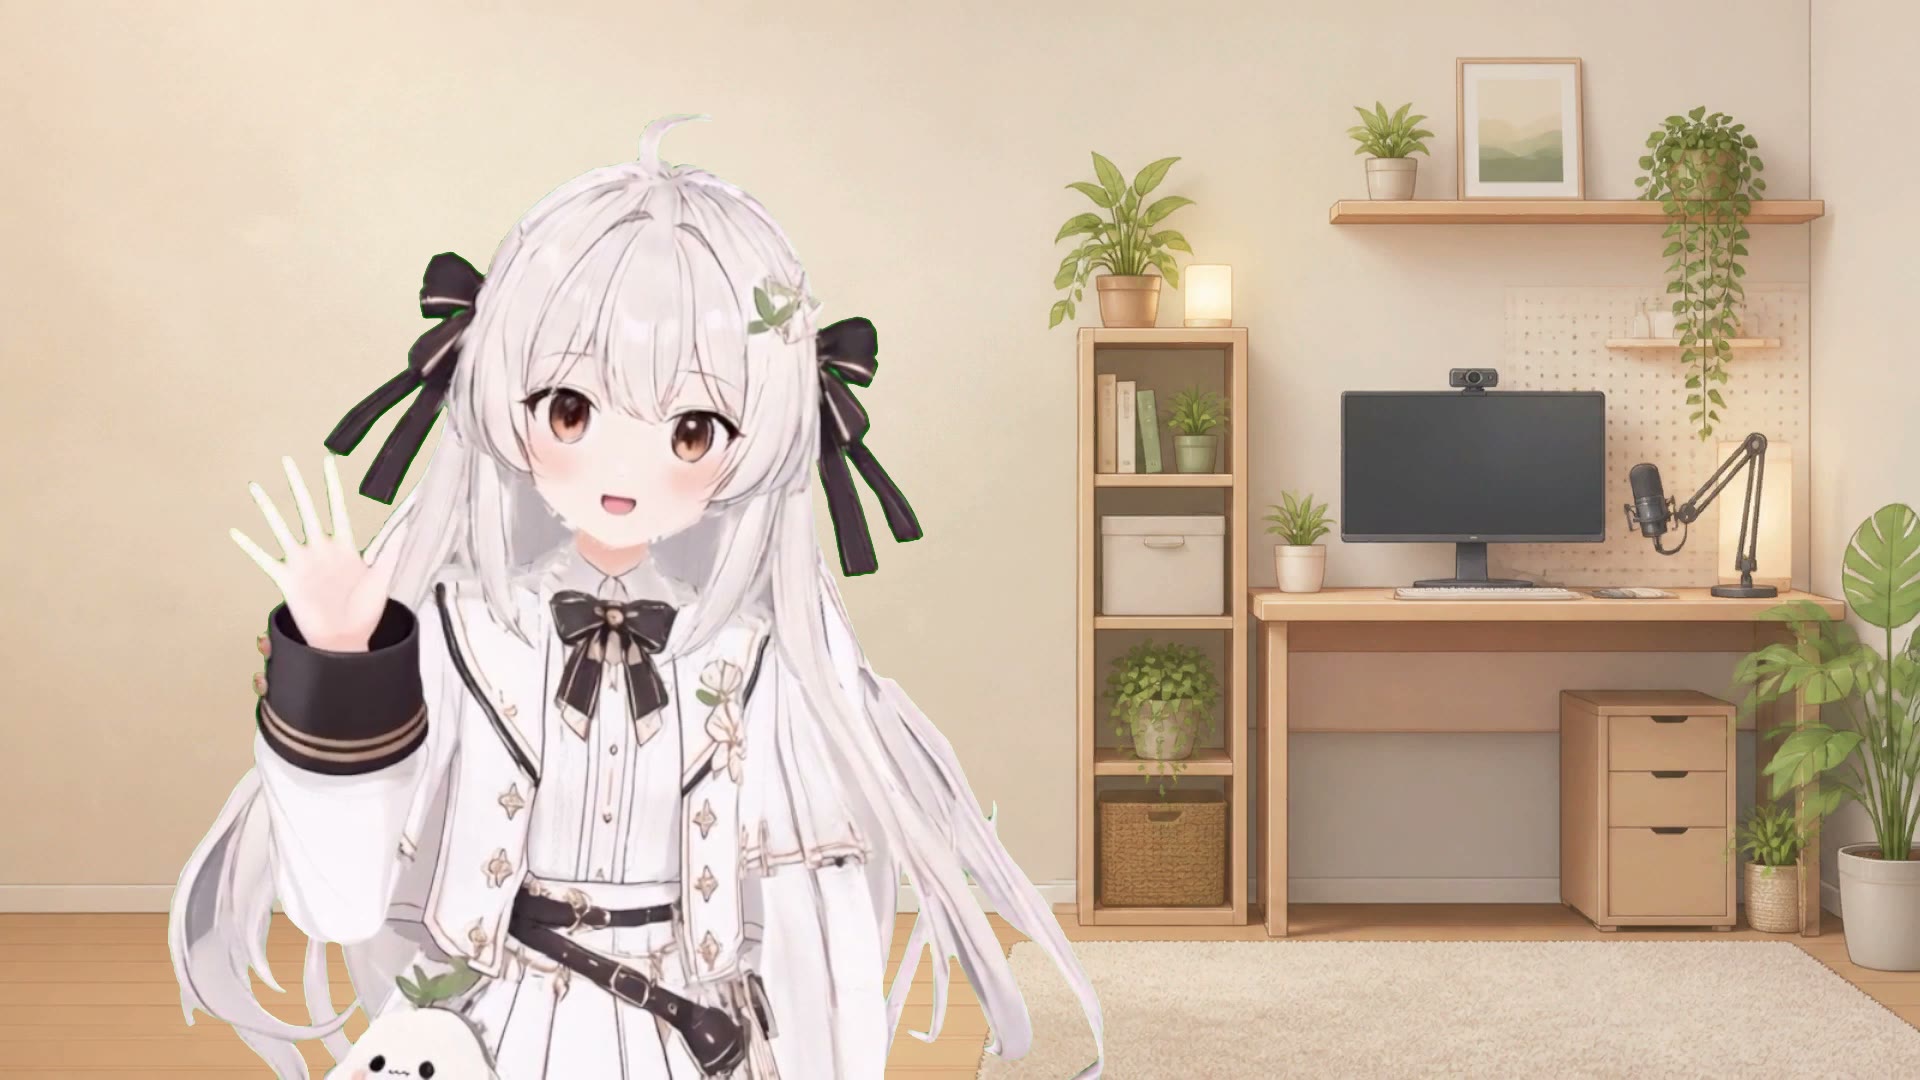
Talk and speech recognition runs, and the clip that fits what you said — a waving greeting here — plays automatically.
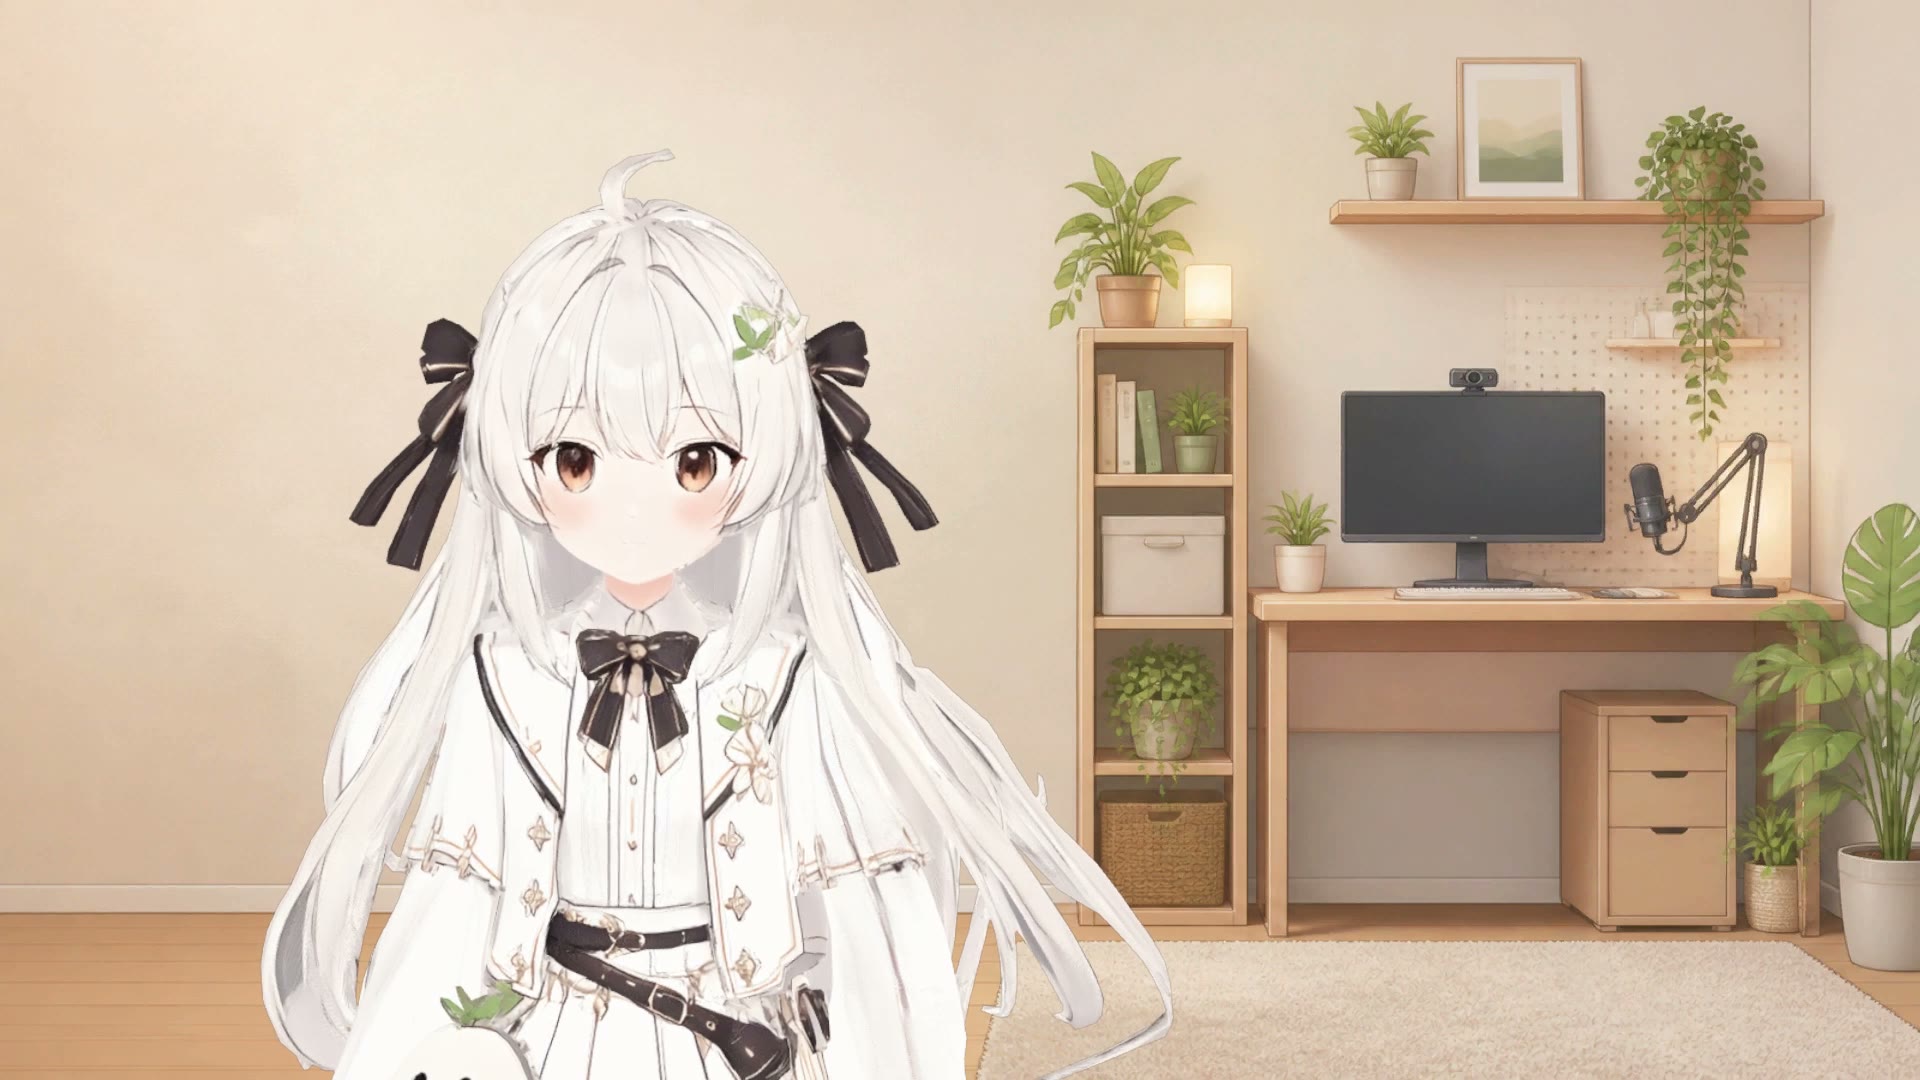
「UIを隠す」 (hide UI) at the top right clears every panel, leaving a clean screen to capture.
AI that runs locally: speech recognition (STT) and the choice of expression and clip (LLM) run on local AI inside your PC. The AI data is fetched and unpacked automatically on first launch, and its state is shown in the stream status panel.
08
Capture it in OBS
There are two ways. Using OBS output under Options is the easier one, and none of the app's interface shows up in it.
Option 1 (recommended) — use OBS output under Options
Open Options at the top right and switch on OBS output under OBS連携
Copy the URL it shows (for example http://127.0.0.1:58090/) with the copy button
In OBS add Sources → + → Browser and paste the URL
Set the width to 1920 and the height to 1080
Put the app in stream mode and choose a character, and the feed starts (the home and creation screens show a black frame)
No plugin and no extra download.
1920x1080 at about 30 fps, video only. There is no audio, so add your microphone as a separate source in OBS.
Only the background, the character and any playing clip are composited — none of the app's buttons or status panels appear. You do not even need to press 「UIを隠す」 (hide UI).
The app takes the first free port from 58090 upward, so use whichever URL the panel shows.
It listens on your own machine (127.0.0.1) only, so another PC cannot connect to it.
Option 2 — window capture
In OBS add Sources → + → Window Capture (or Display Capture) and pick this app
In the app, press 「UIを隠す」 (hide UI) at the top right for a clean screen
When the background is the green screen (the default)
Add Filters → Chroma Key in OBS to key out the green, then layer it into your stream design.
If you picked one of the in-app illustrated backgrounds, no chroma key is needed.
Frequently asked questions
How long does generation take?
A 3D model takes anywhere from a few minutes to several tens of minutes depending on the mode (Full body ver3 takes about 15 minutes; progress and the current step are shown on screen). Expression sets and clips each take a few minutes. You just wait, and a dialog tells you when it is done.
What are points?
Paid points, spent by the cloud generation features: Full body ver1 (not recommended) 800 pt / Full body ver2 (not recommended) 2500 pt / Full body ver3 (recommended) 800 pt / Bust 800 pt / expression set 200 pt / background 60 pt / video 85 pt per second / input image from a description 25 pt. Your balance is shown at the top right and you buy more from the shop in the app. Streaming itself — lip sync, expression switching, clip playback and the OBS output — costs no points. If a generation fails because of a system fault, the points are returned automatically.
Is audio sent anywhere while I stream?
No. Speech recognition and the choice of expression and clip are handled by local AI on your PC.
My microphone isn't responding
Check that "マイク" (mic) in the stream status panel is ON, and that the right input device is selected in the dropdown. On macOS the app also needs microphone permission in System Settings.
Where do I pick up a character I already made?
From the home screen choose "モデル生成/設定" (model / settings) → "保存済み選択" (open saved), and pick your character from the thumbnail list.
The screens shown are from a build in development. Specifications may change.